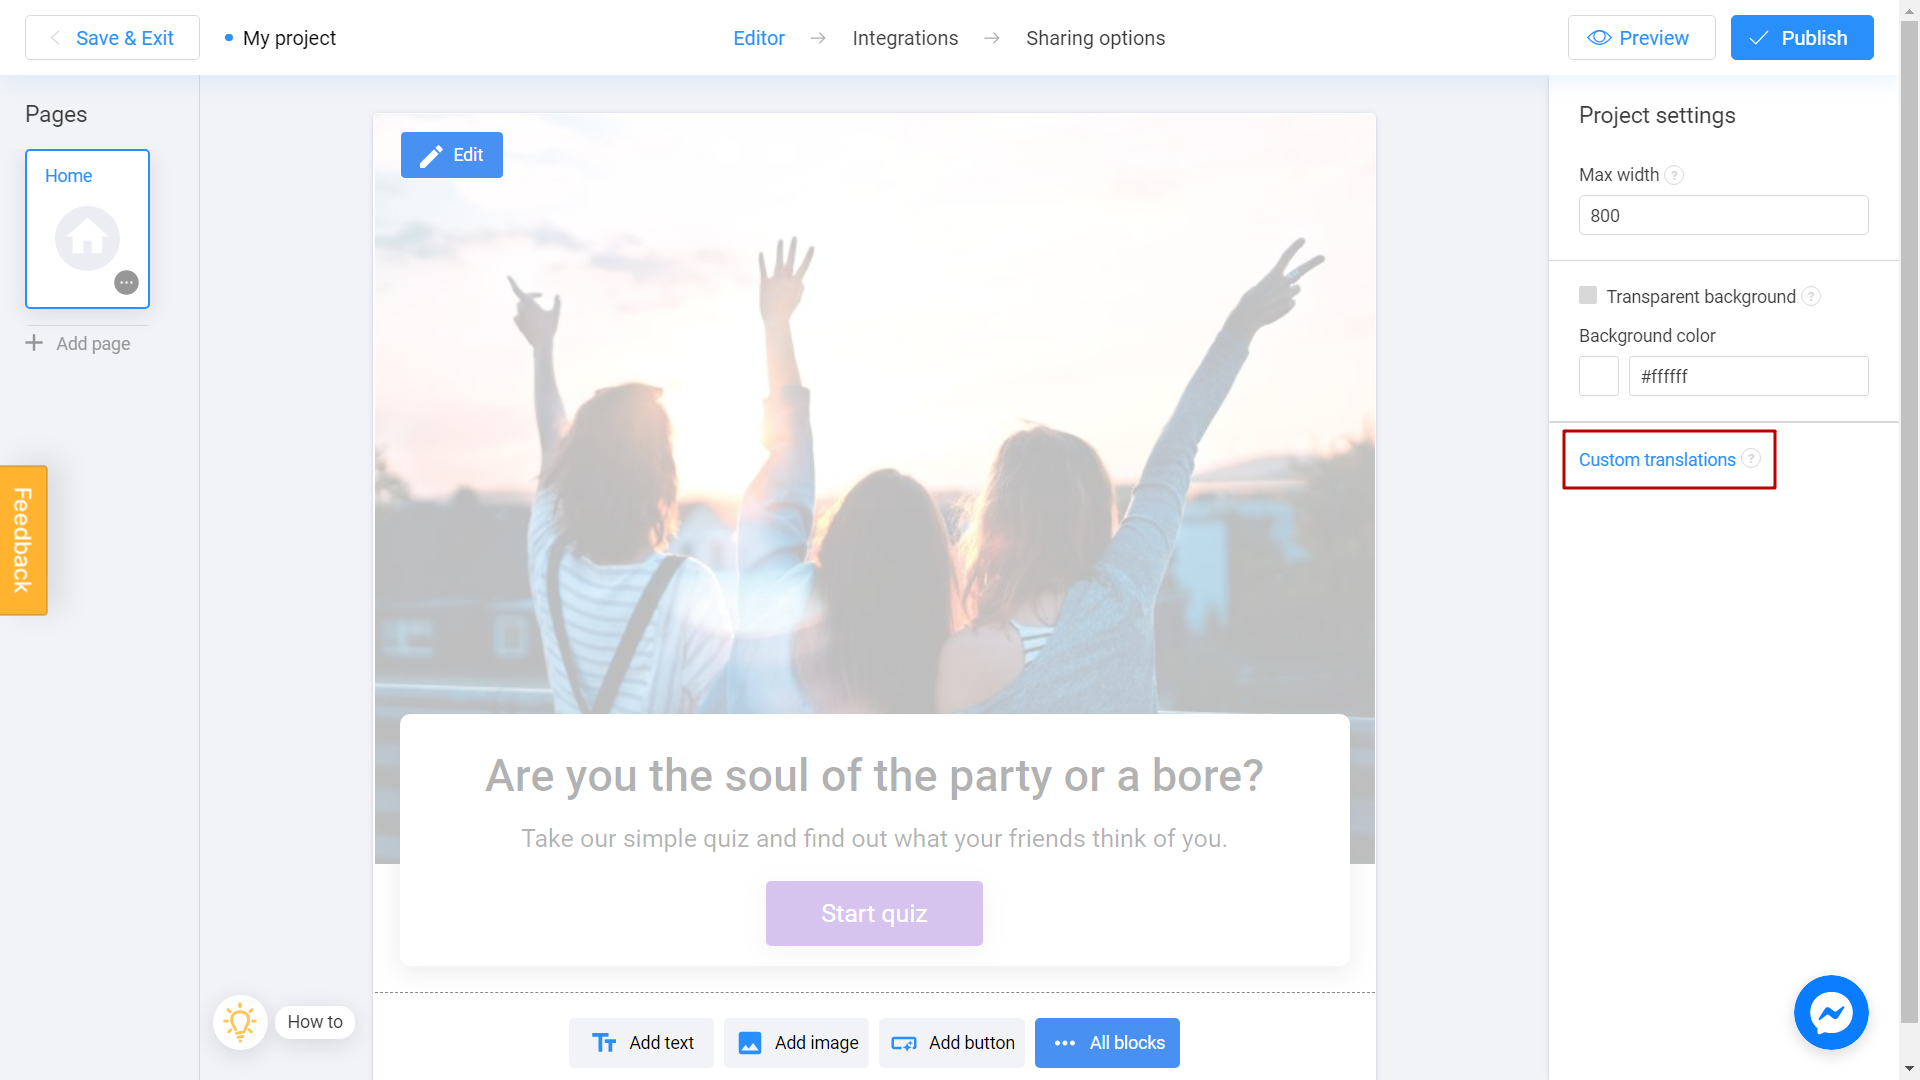
If you want to make your project more international and affordable for users from around the world, you can use custom translations feature. We detect user language based on user's browser settings, not geo information. The following guide describes how to setup different languages for your app. First of all, open your project in Editor and find Custom translations link on the right panel.
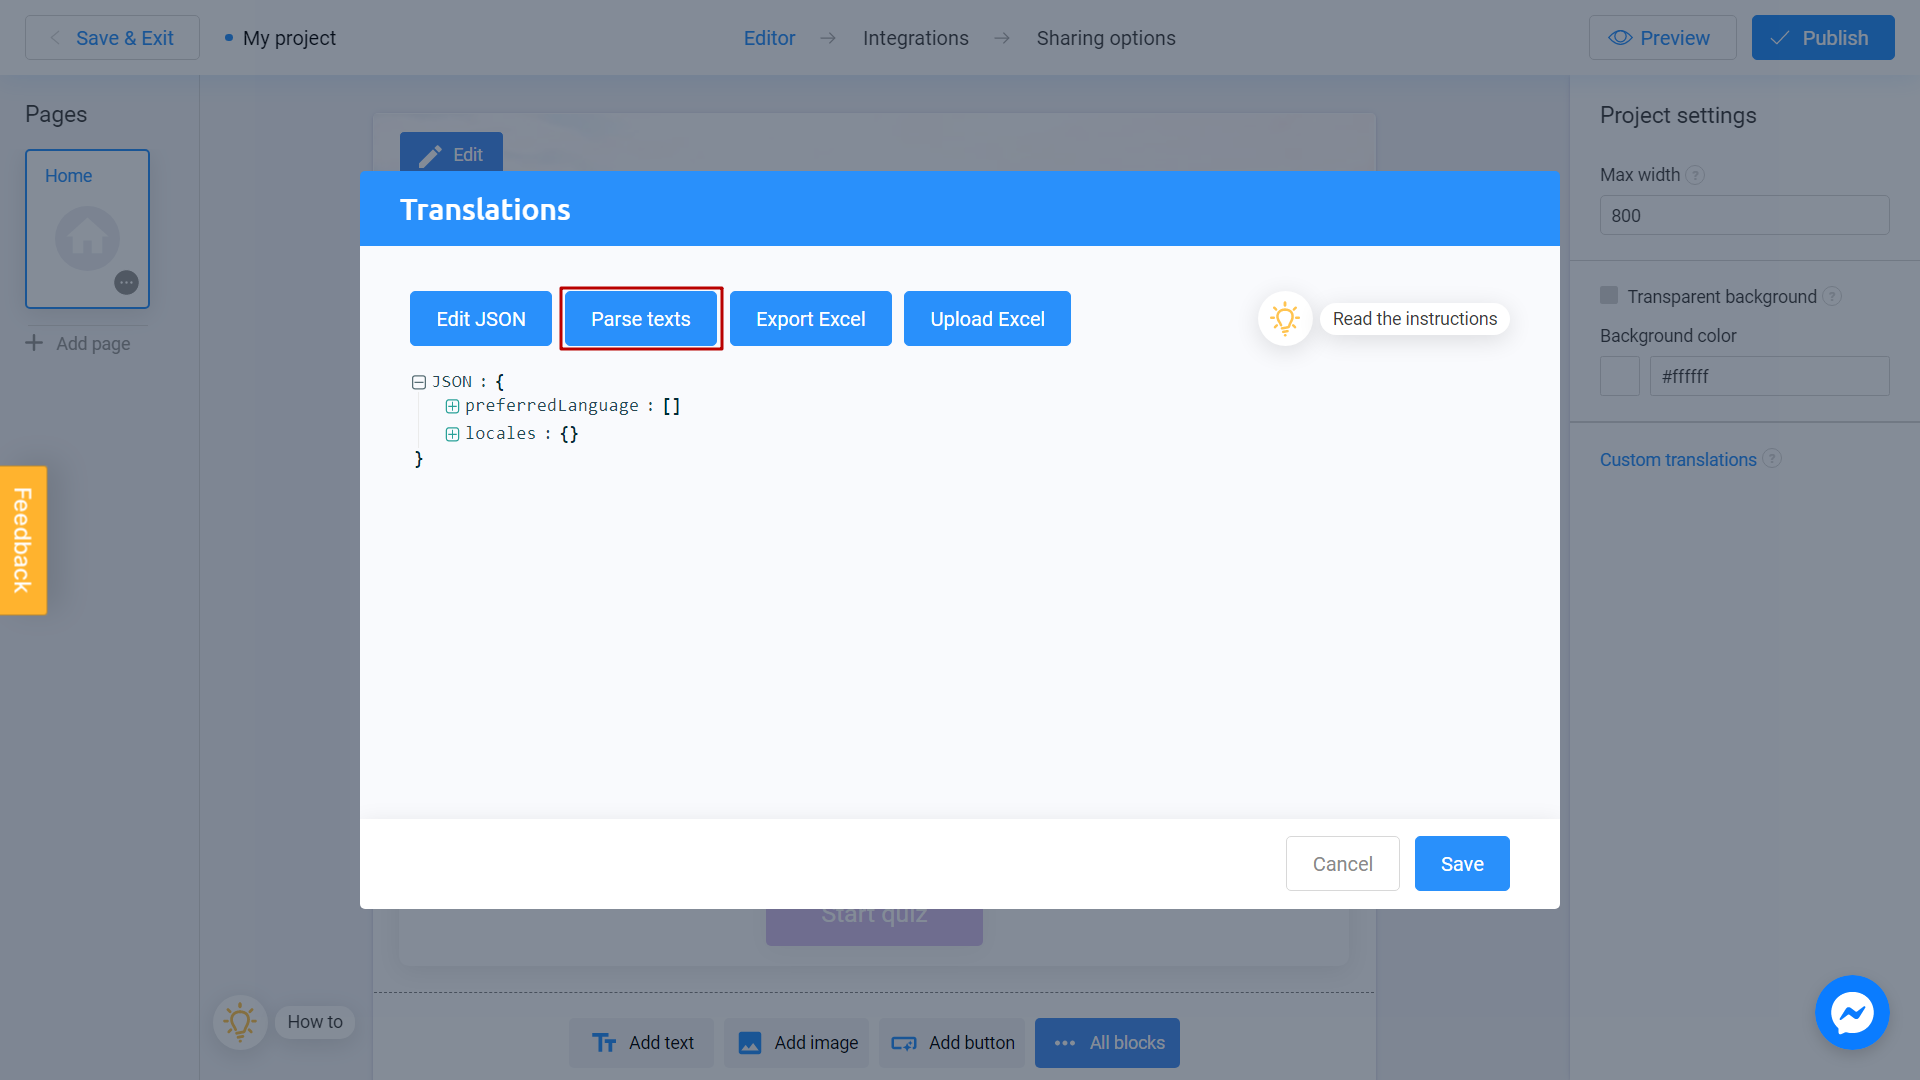
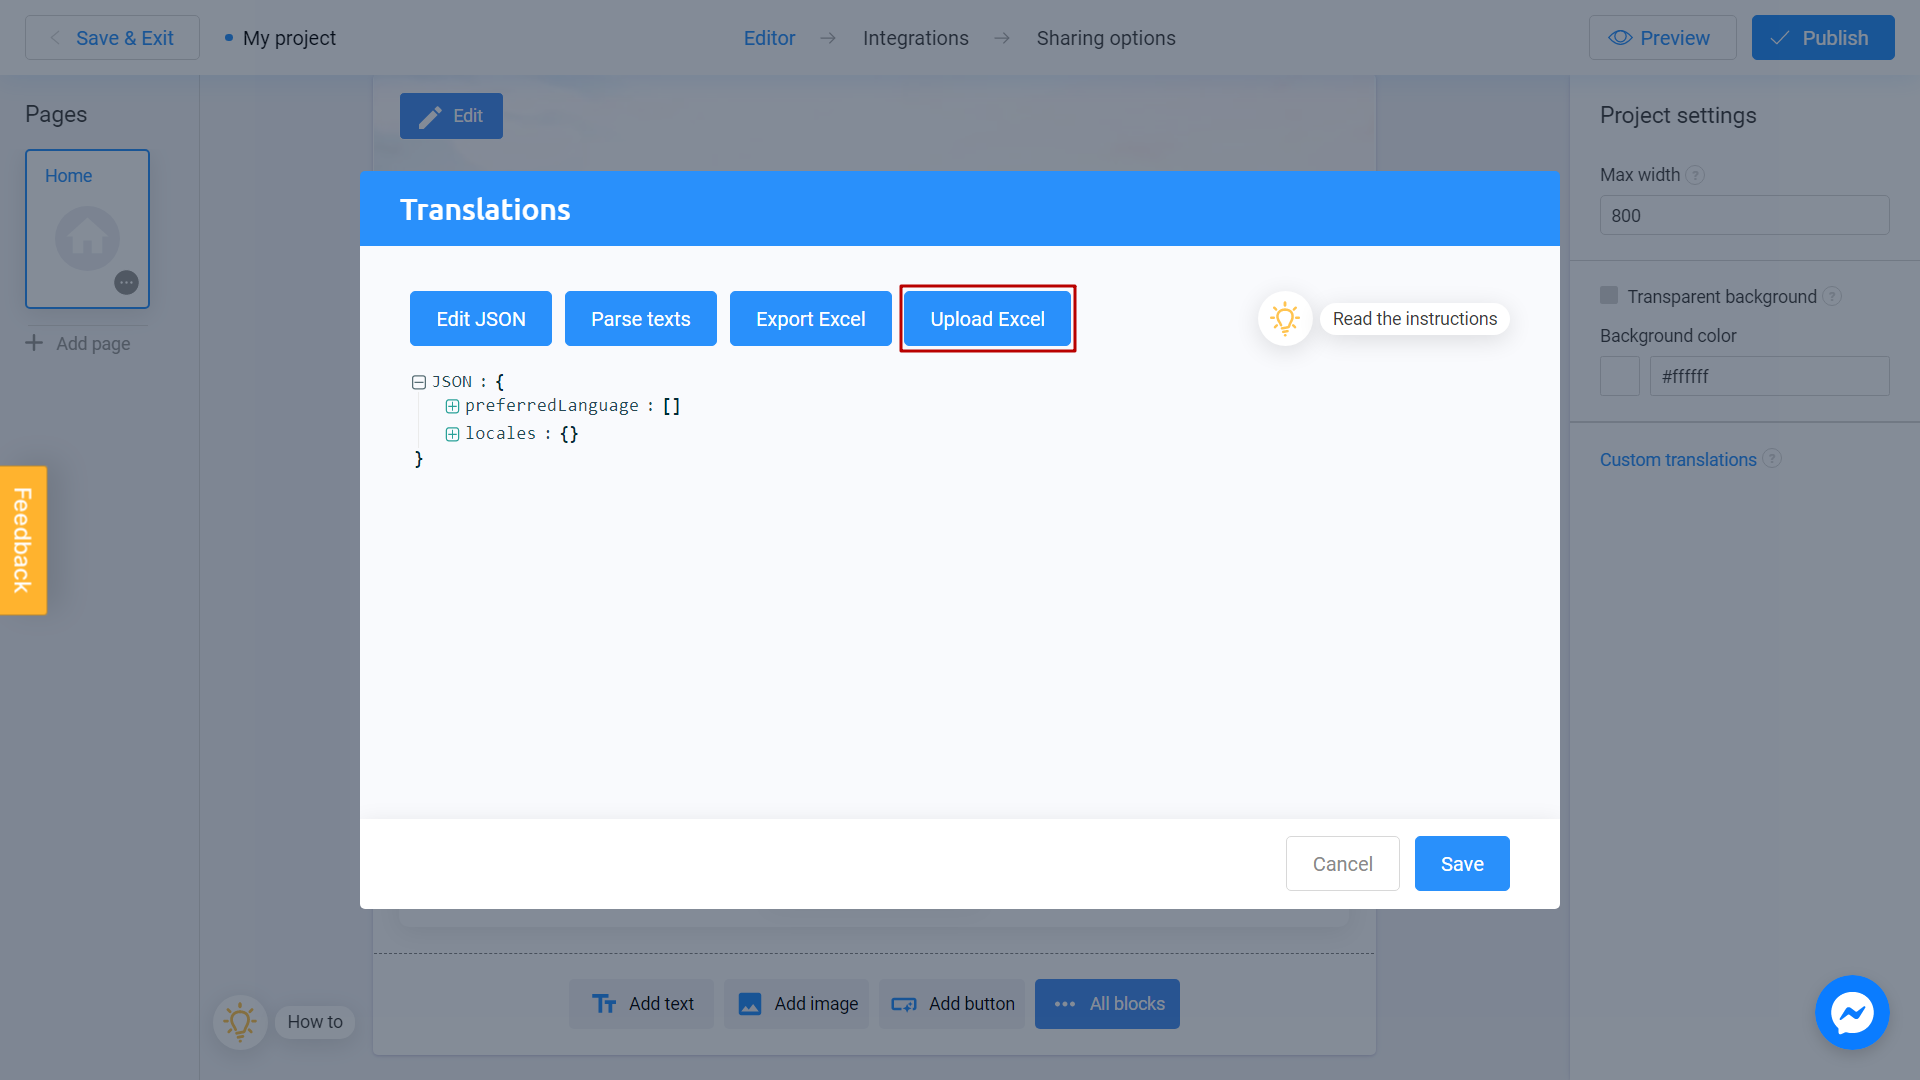
Click on this link and you will see the dialog. Then, click Parse texts to see all texts in your project.
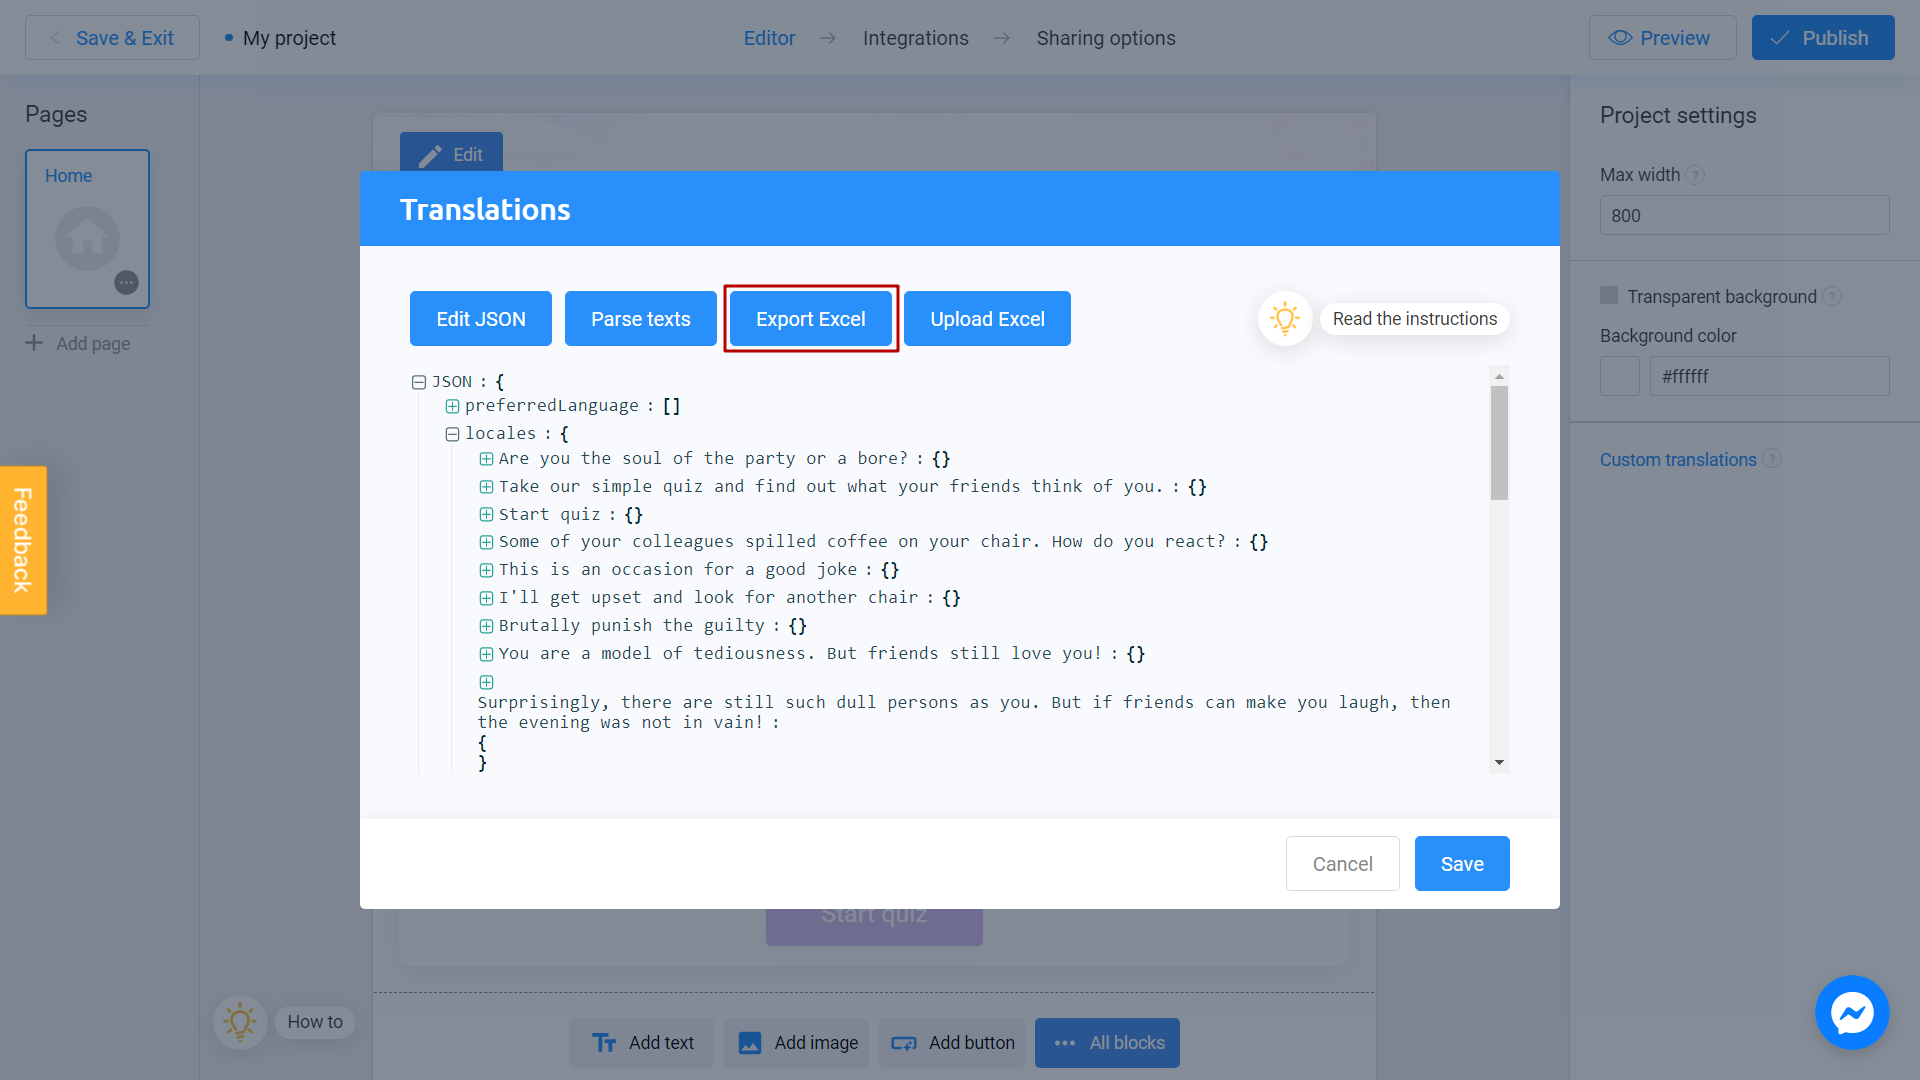
Click Export Excel to download excel file with texts.
What preferredLanguages setting does? You may setup list of languages for compulsory applying in the app instead of user's browser language setting.
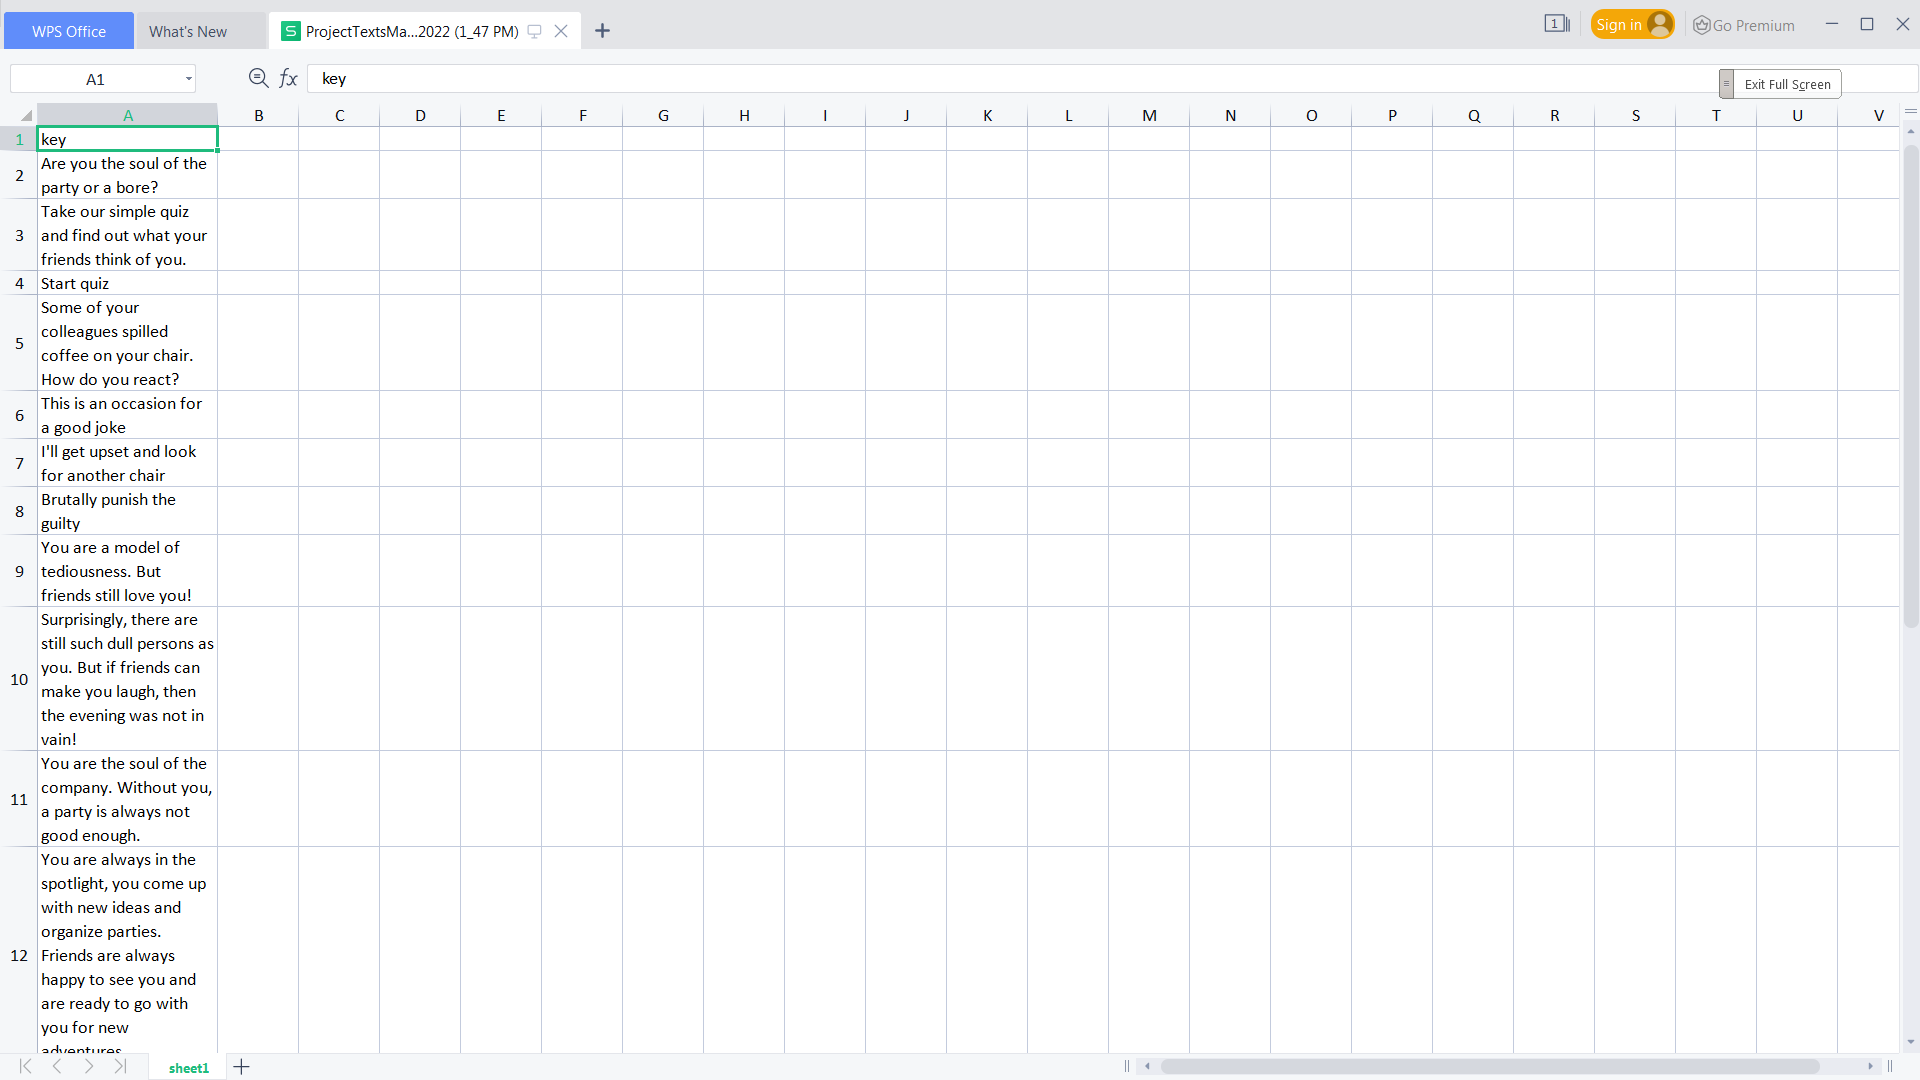
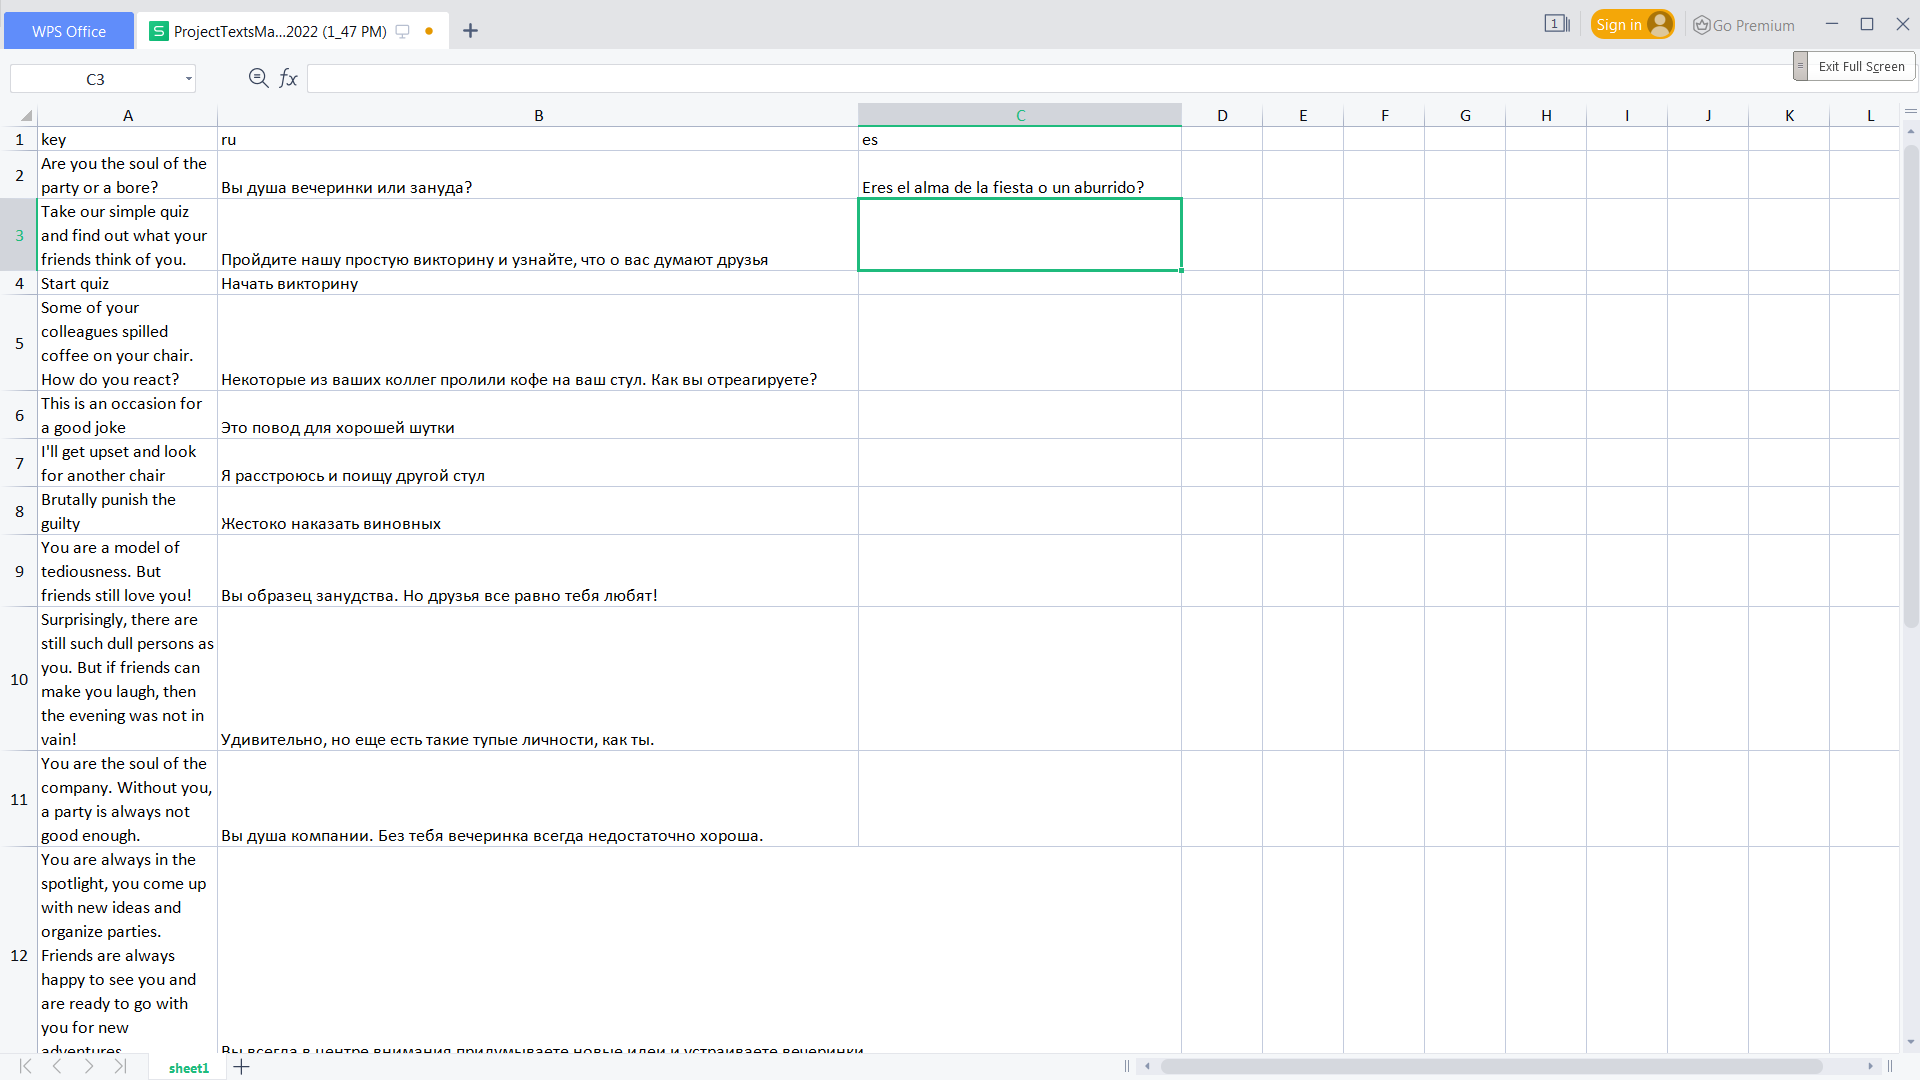
This file will look like that:
Create new columns with language codes and translation texts. Here is an example:
See what languages codes are recommeded to use
"af":    "Afrikaans"
"sq":    "Albanian"
"an":    "Aragonese"
"ar":    "Arabic"
"hy":    "Armenian",
"as":    "Assamese"
"ast":   "Asturian"
"az":    "Azerbaijani"
"eu":    "Basque"
"bg":    "Bulgarian"
"be":    "Belarusian"
"bn":    "Bengali"
"bs":    "Bosnian"
"br":    "Breton"
"bg":    "Bulgarian"
"my":    "Burmese"
"ca":    "Catalan"
"ch":    "Chamorro"
"ce":    "Chechen"
"zh":    "Chinese"
"cv":    "Chuvash"
"co":    "Corsican"
"cr":    "Cree"
"hr":    "Croatian"
"cs":    "Czech"
"da":    "Danish"
"nl":    "Dutch"
"en":    "English"
"eo":    "Esperanto"
"et":    "Estonian"
"fo":    "Faeroese"
"fa":    "Farsi"
"fj":    "Fijian"
"fi":    "Finnish"
"fr":    "French"
"fy":    "Frisian"
"fur":   "Friulian"
"gd":    "Gaelic"
"gl":    "Galacian"
"ka":    "Georgian"
"de":    "German"
"el":    "Greek"
"gu":    "Gujurati"
"ht":    "Haitian"
"he":    "Hebrew"
"hi":    "Hindi"
"hu":    "Hungarian"
"is":    "Icelandic"
"id":    "Indonesian"
"iu":    "Inuktitut"
"ga":    "Irish"
"it":    "Italian"
"ja":    "Japanese"
"kn":    "Kannada"
"ks":    "Kashmiri"
"kk":    "Kazakh"
"km":    "Khmer"
"ky":    "Kirghiz"
"tlh":   "Klingon"
"ko":    "Korean"
"la":    "Latin"
"lv":    "Latvian"
"lt":    "Lithuanian"
"lb":    "Luxembourgish"
"mk":    "FYRO Macedonian"
"ms":    "Malay"
"ml":    "Malayalam"
"mt":    "Maltese"
"mi":    "Maori"
"mr":    "Marathi"
"mo":    "Moldavian"
"nv":    "Navajo"
"ng":    "Ndonga"
"ne":    "Nepali"
"no":    "Norwegian"
"oc":    "Occitan"
"or":    "Oriya"
"om":    "Oromo"
"fa":    "Persian"
"pl":    "Polish"
"pt":    "Portuguese"
"pa":    "Punjabi"
"qu":    "Quechua"
"rm":    "Rhaeto-Romanic"
"ro":    "Romanian"
"ru":    "Russian"
"sz":    "Sami (Lappish)"
"sg":    "Sango"
"sa":    "Sanskrit"
"sc":    "Sardinian"
"gd":    "Scots Gaelic"
"sd":    "Sindhi"
"si":    "Singhalese"
"sr":    "Serbian"
"sk":    "Slovak"
"sl":    "Slovenian"
"so":    "Somani"
"sb":    "Sorbian"
"es":    "Spanish"
"sx":    "Sutu"
"sw":    "Swahili"
"sv":    "Swedish"
"ta":    "Tamil"
"tt":    "Tatar"
"te":    "Teluga"
"th":    "Thai"
"tig":   "Tigre"
"ts":    "Tsonga"
"tn":    "Tswana"
"tr":    "Turkish"
"tk":    "Turkmen"
"uk":    "Ukrainian"
"hsb":   "Upper Sorbian"
"ur":    "Urdu"
"ve":    "Venda"
"vi":    "Vietnamese"
"vo":    "Volapuk"
"wa":    "Walloon"
"cy":    "Welsh"
"xh":    "Xhosa"
"ji":    "Yiddish"
"zu":    "Zulu"
Let's return to Custom translations in our project. To add your translations, click Upload Excel button.
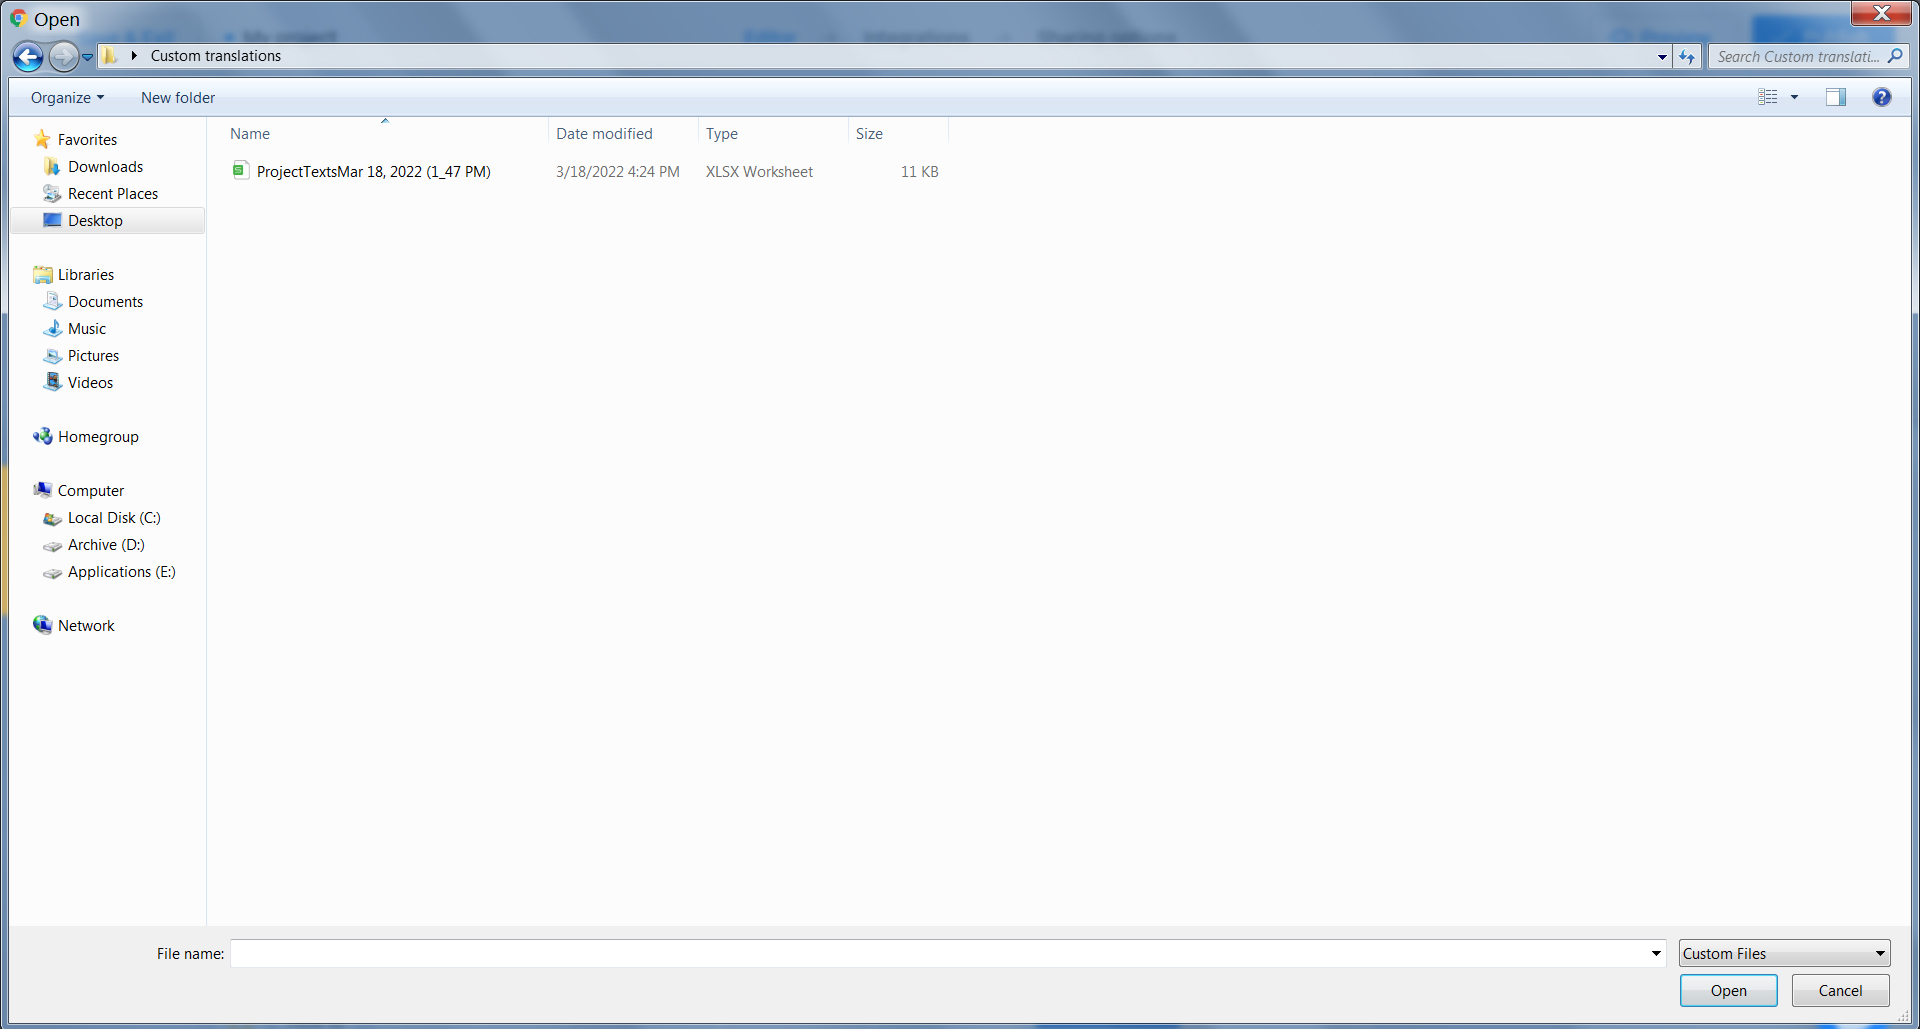
Select XLS file with translations.
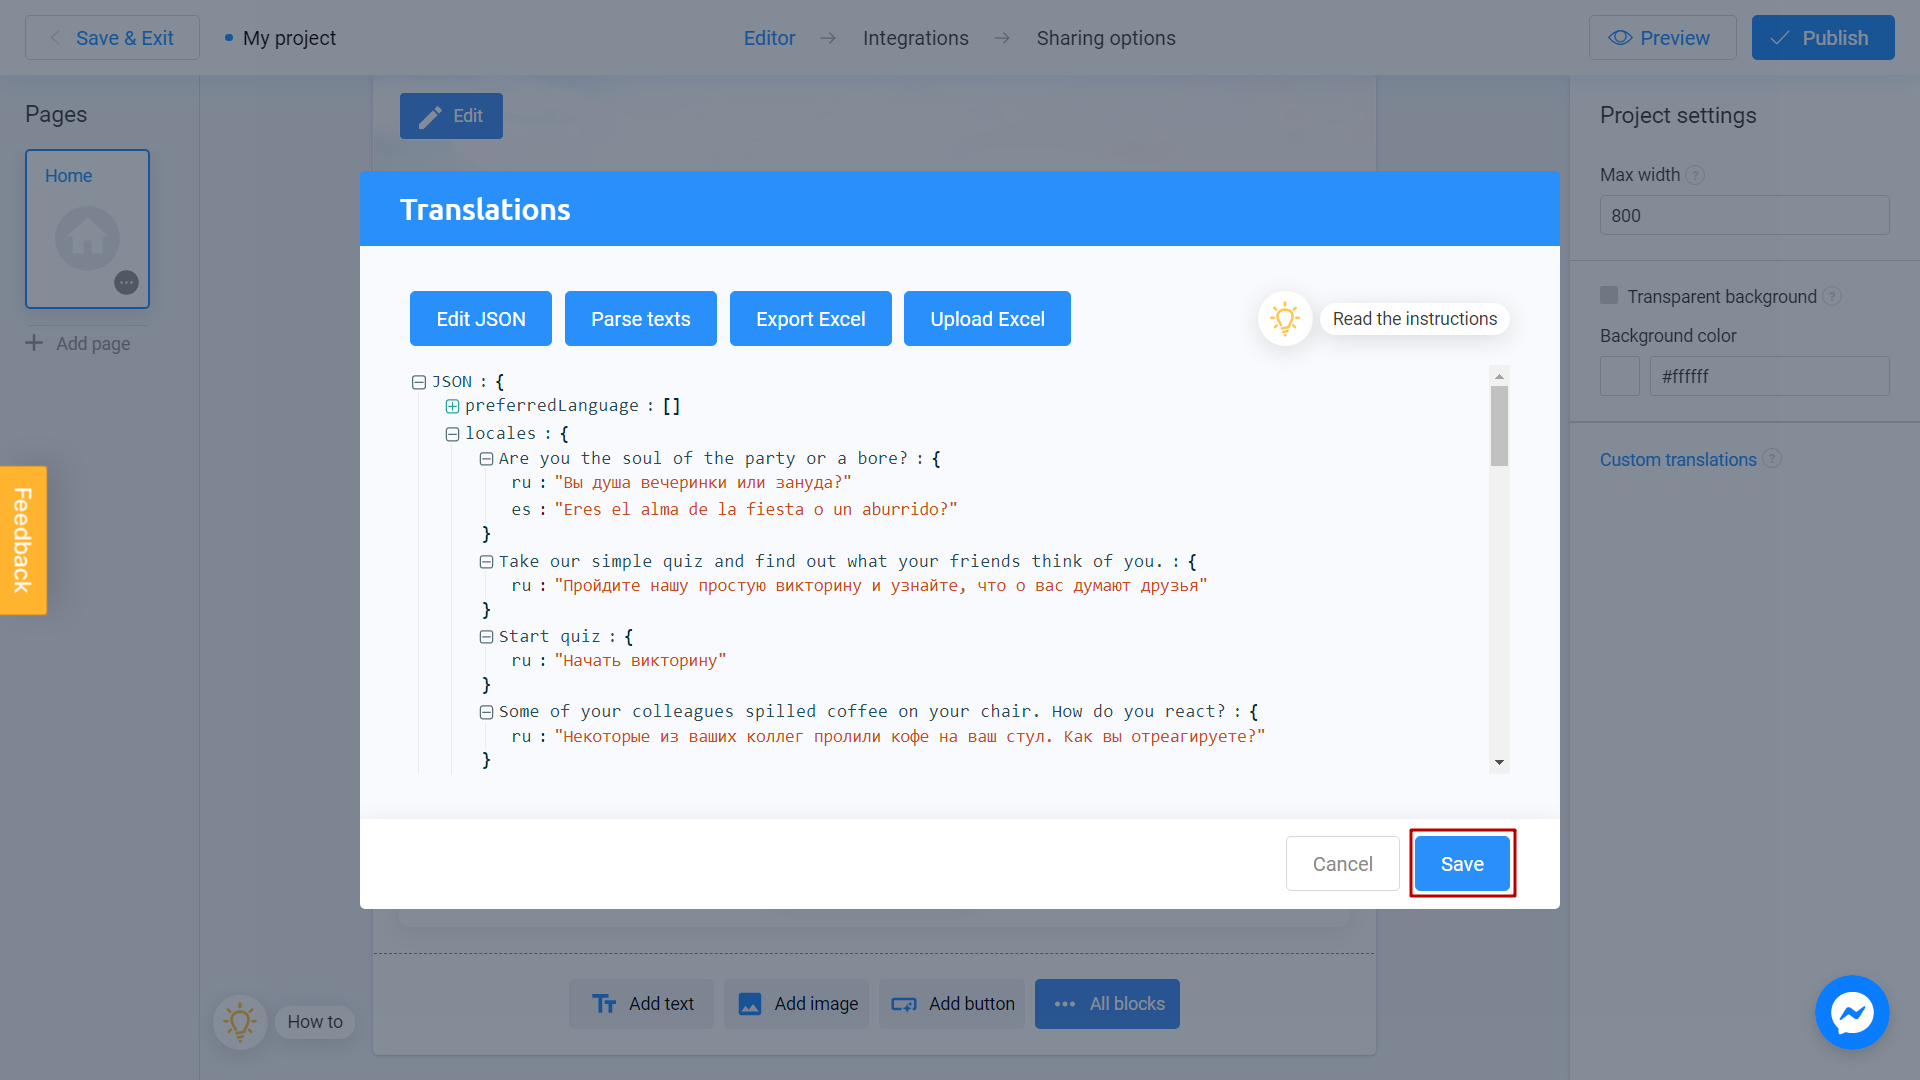
You will see new texts in the modal. Click Save and publish your project. It's done!
User will see the language depending on his browser settings.
If you come across untranslated sentences in your project, you can easily add the translation as the last line in your document. This way, the new translation will also be included in your project.
Congratulations! You are now well on your way to adding different languages to your projects. It's important to note that this feature not only facilitates language localization but also enables the customization of interface elements such as buttons and menus. To achieve this, simply modify the corresponding text elements within your file. This allows you to further customize your game and personalize it for your audience. Best of luck!