Trivia Quiz is an original way to test your audience's knowledge. Do you want to identify the most avid movie fan? Or do an interesting math test? This test is right for you.
Learn to create a Trivia Quiz with this video tutorial:
Creating a Layout
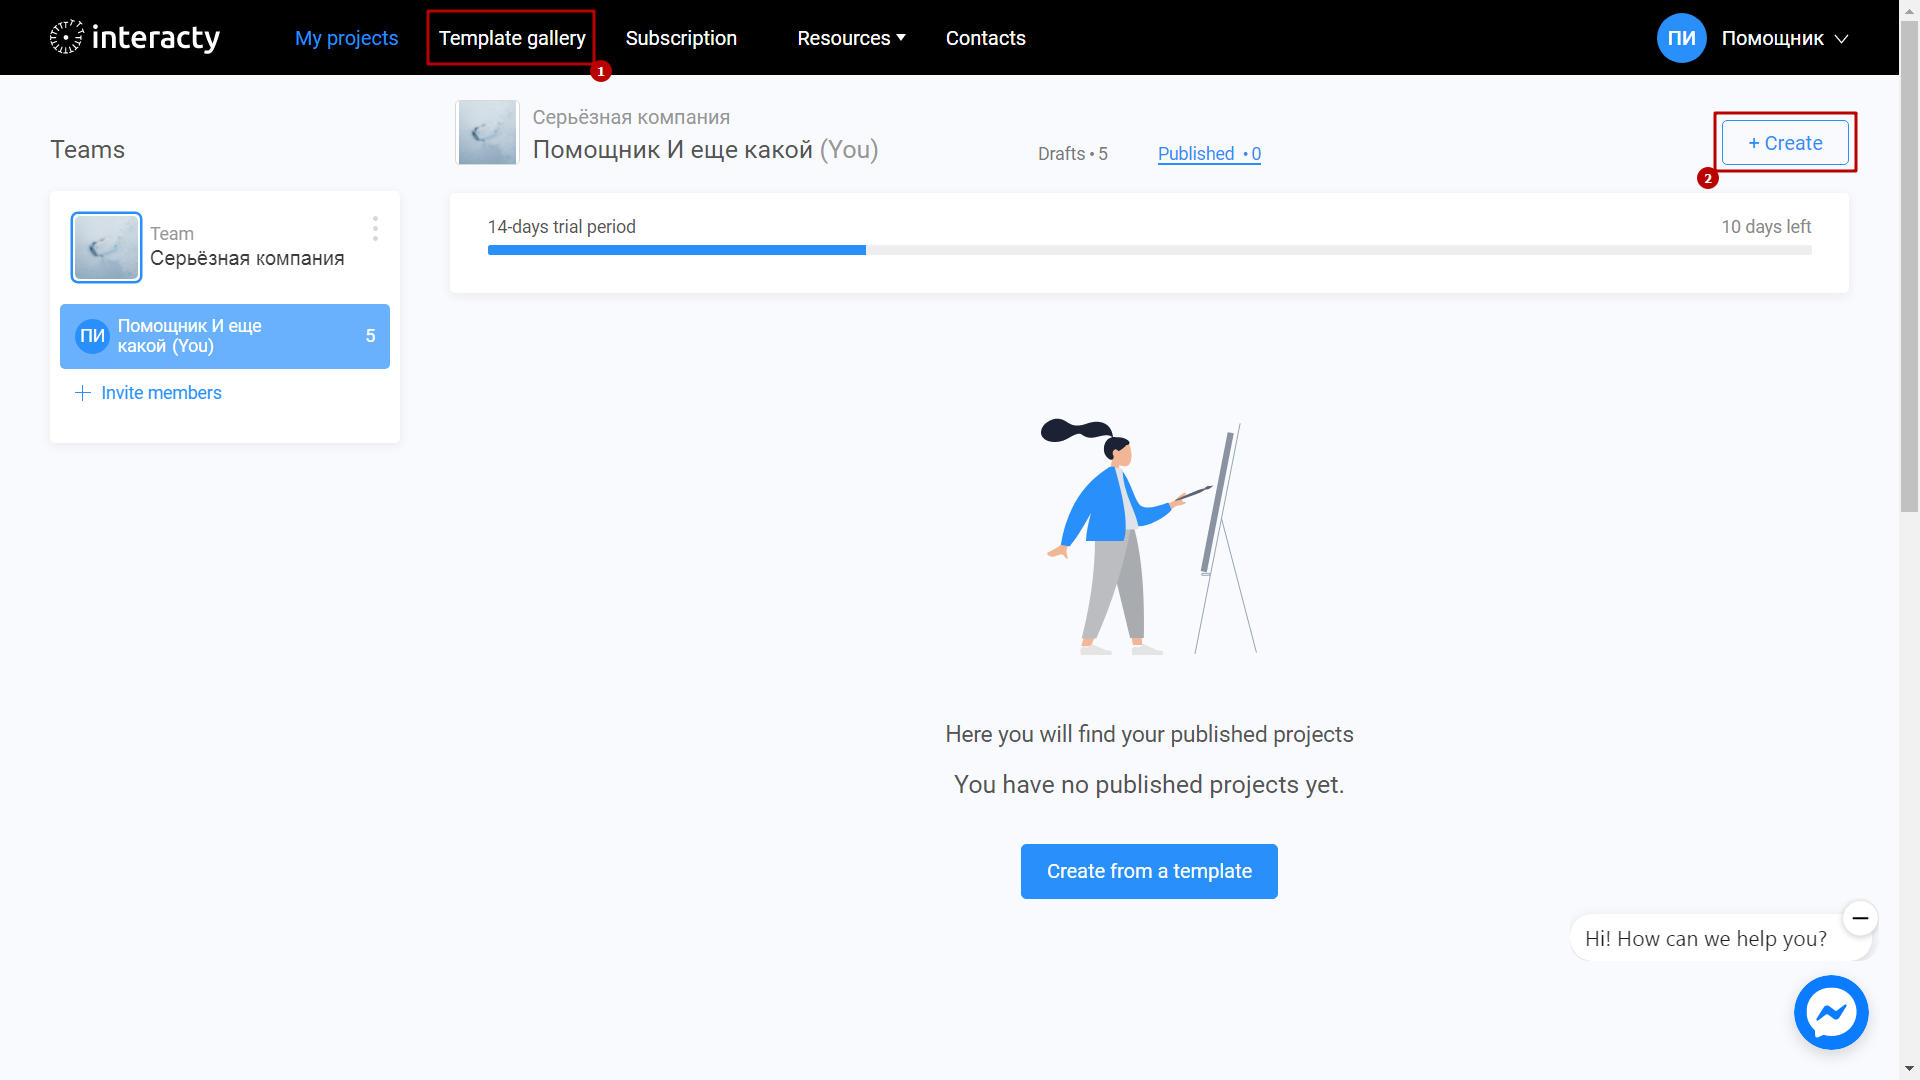
Sign in to your profile on interacty.me. To create a test, click the Template Gallery (1) button at the top of the screen. You can also use the Create (2) button if you want to create a new quiz.
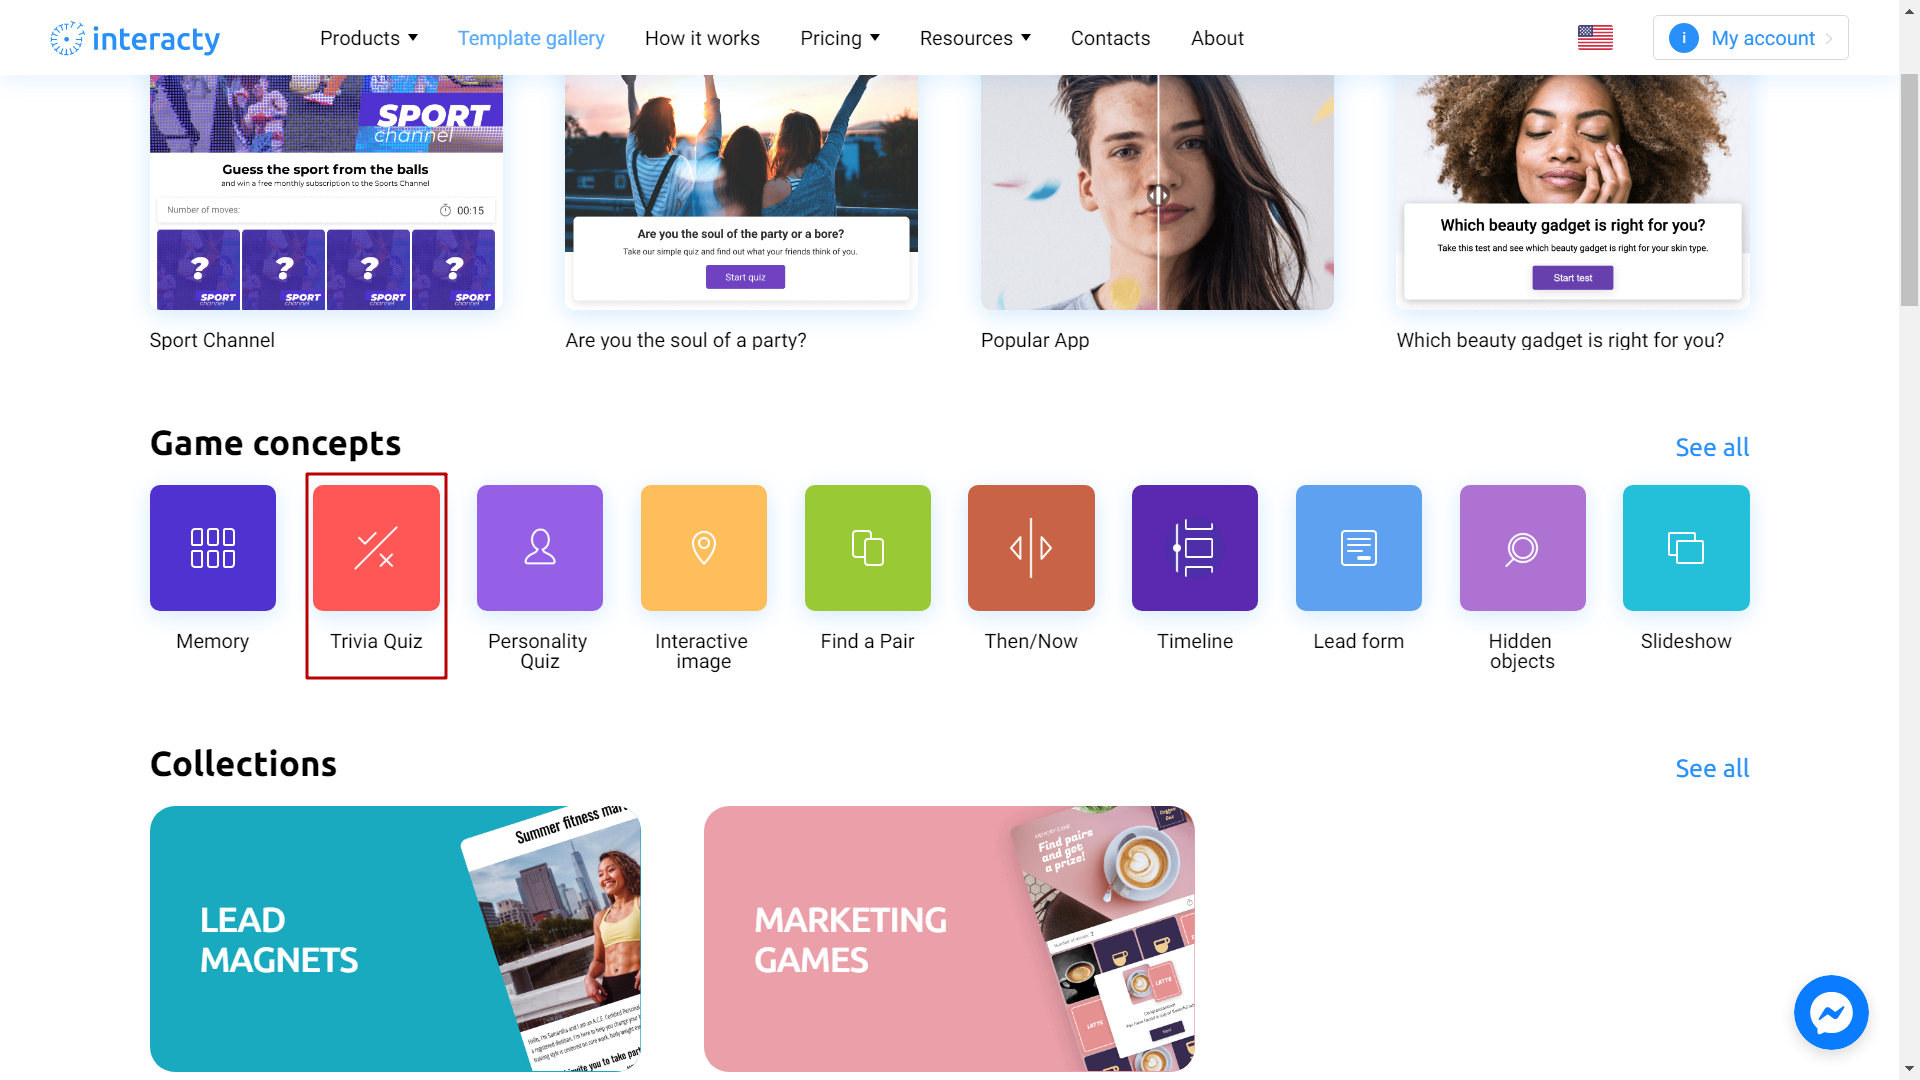
Select a Trivia Quiz.
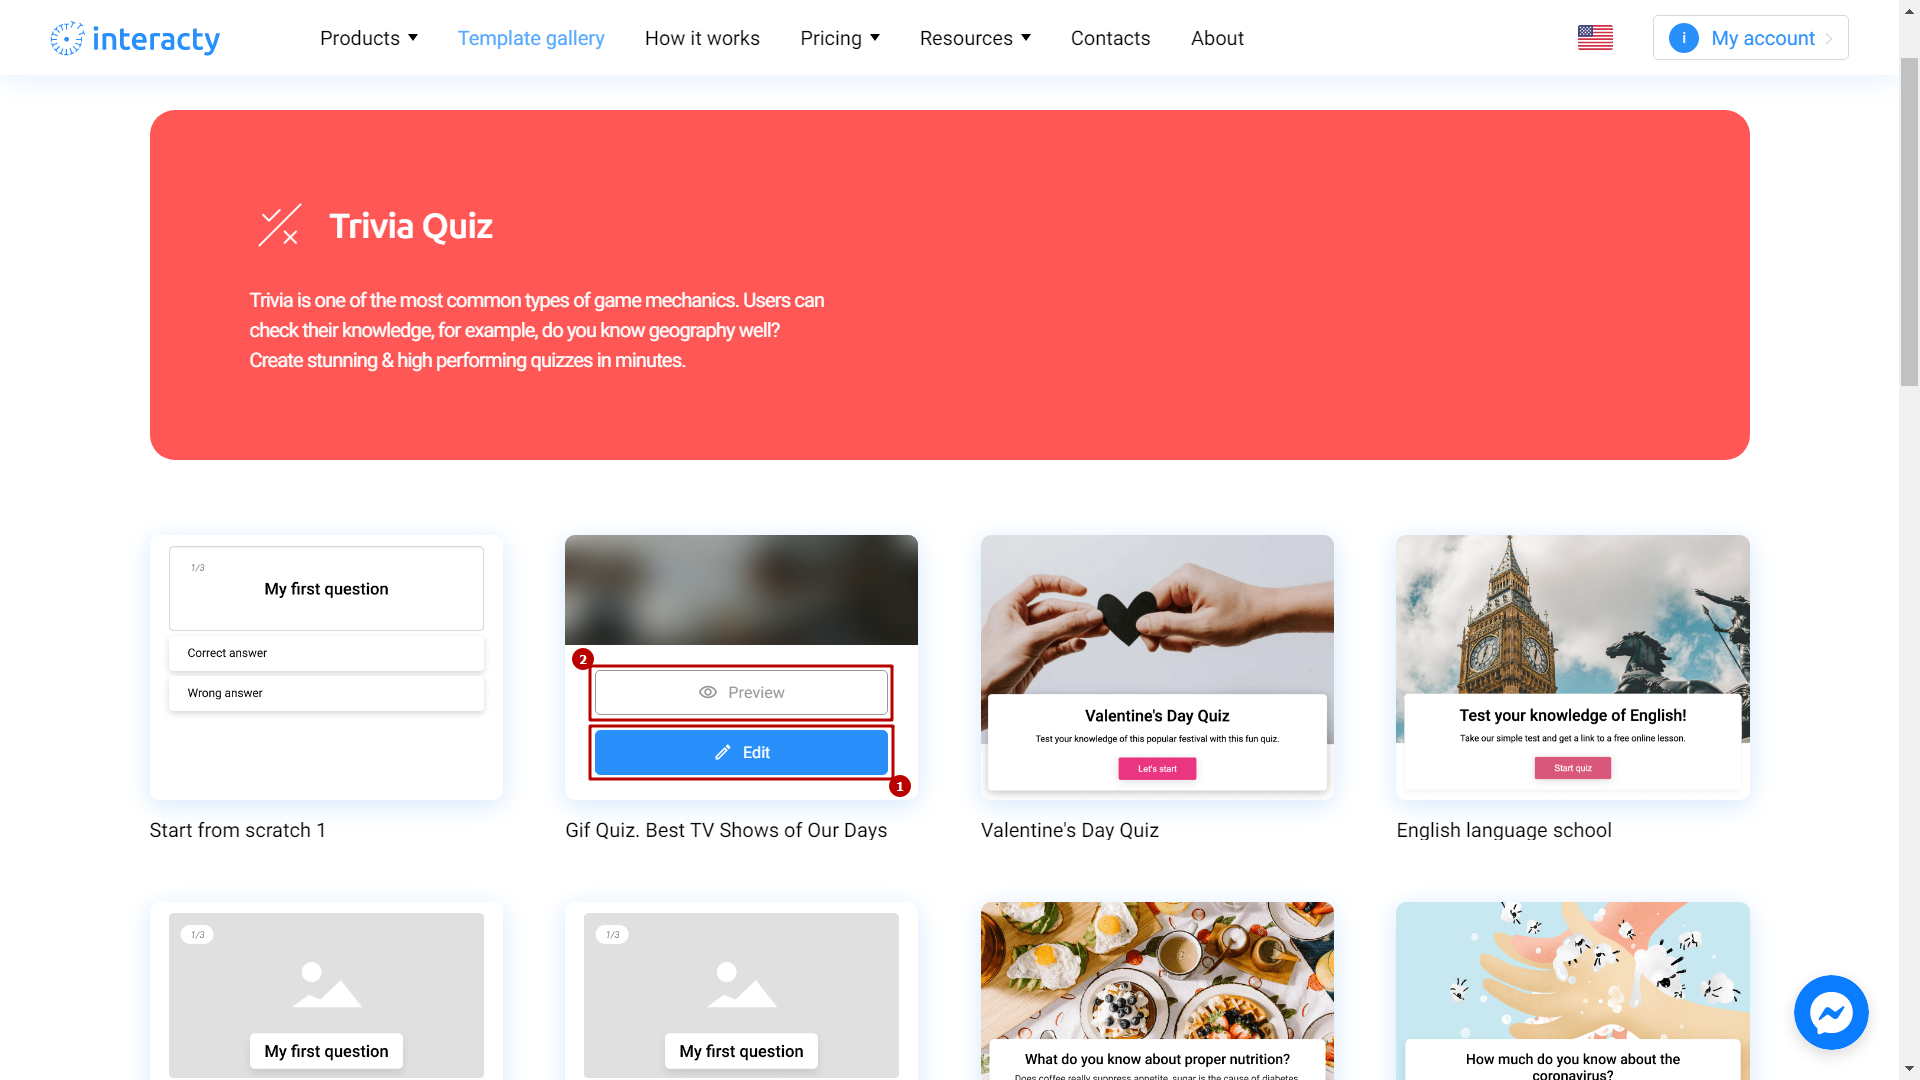
Select the template you like from the list by clicking the Edit (1). The Preview (2) button will allow you to preview the template.
Template Editing
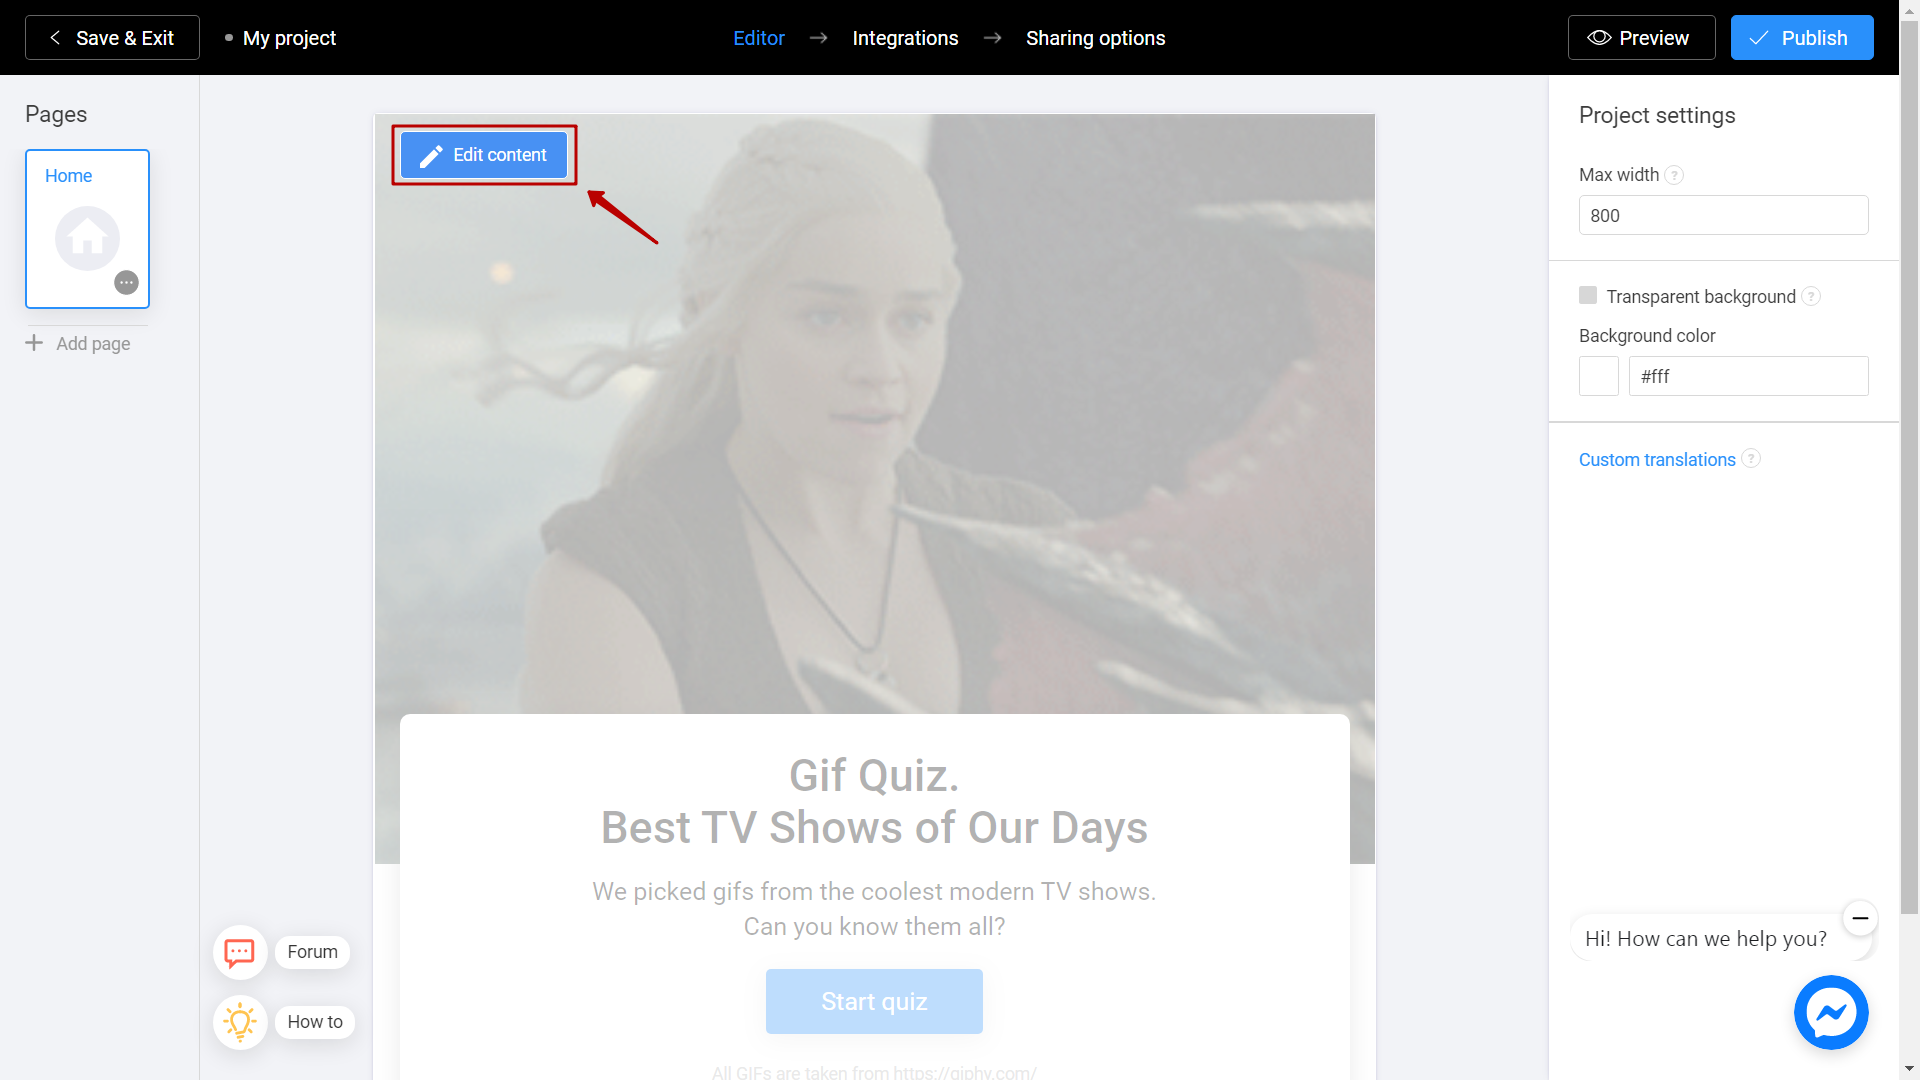
The editor allows you to efficiently and quickly set up your test settings. Click the Edit Content button to get started.
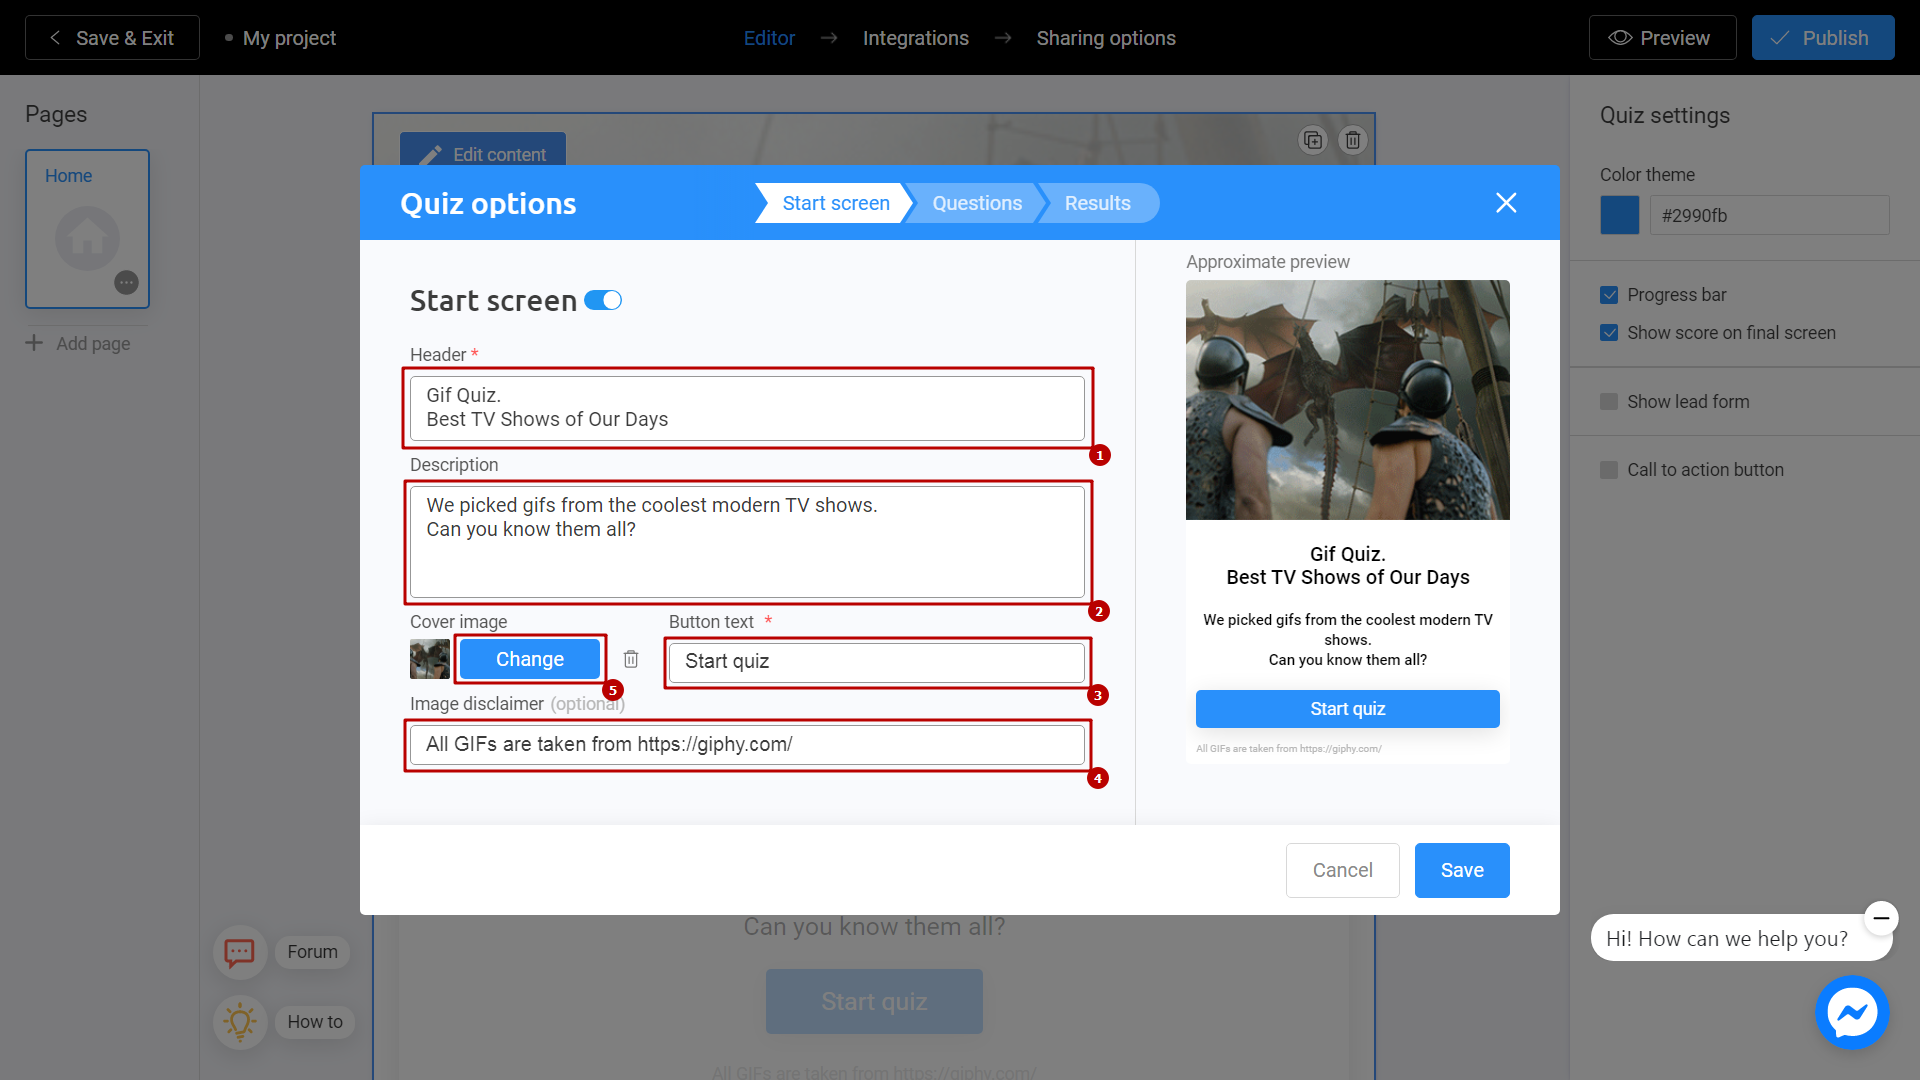
Fill a field Header (1) with the name of your test. Your viewers will see it first. In the Description (2) field you can add a short information about your test. You can also change the Button (3) text and Image disclaimer (4) if needed. Finally, click the Edit (5) button in the Cover image field to add an image.
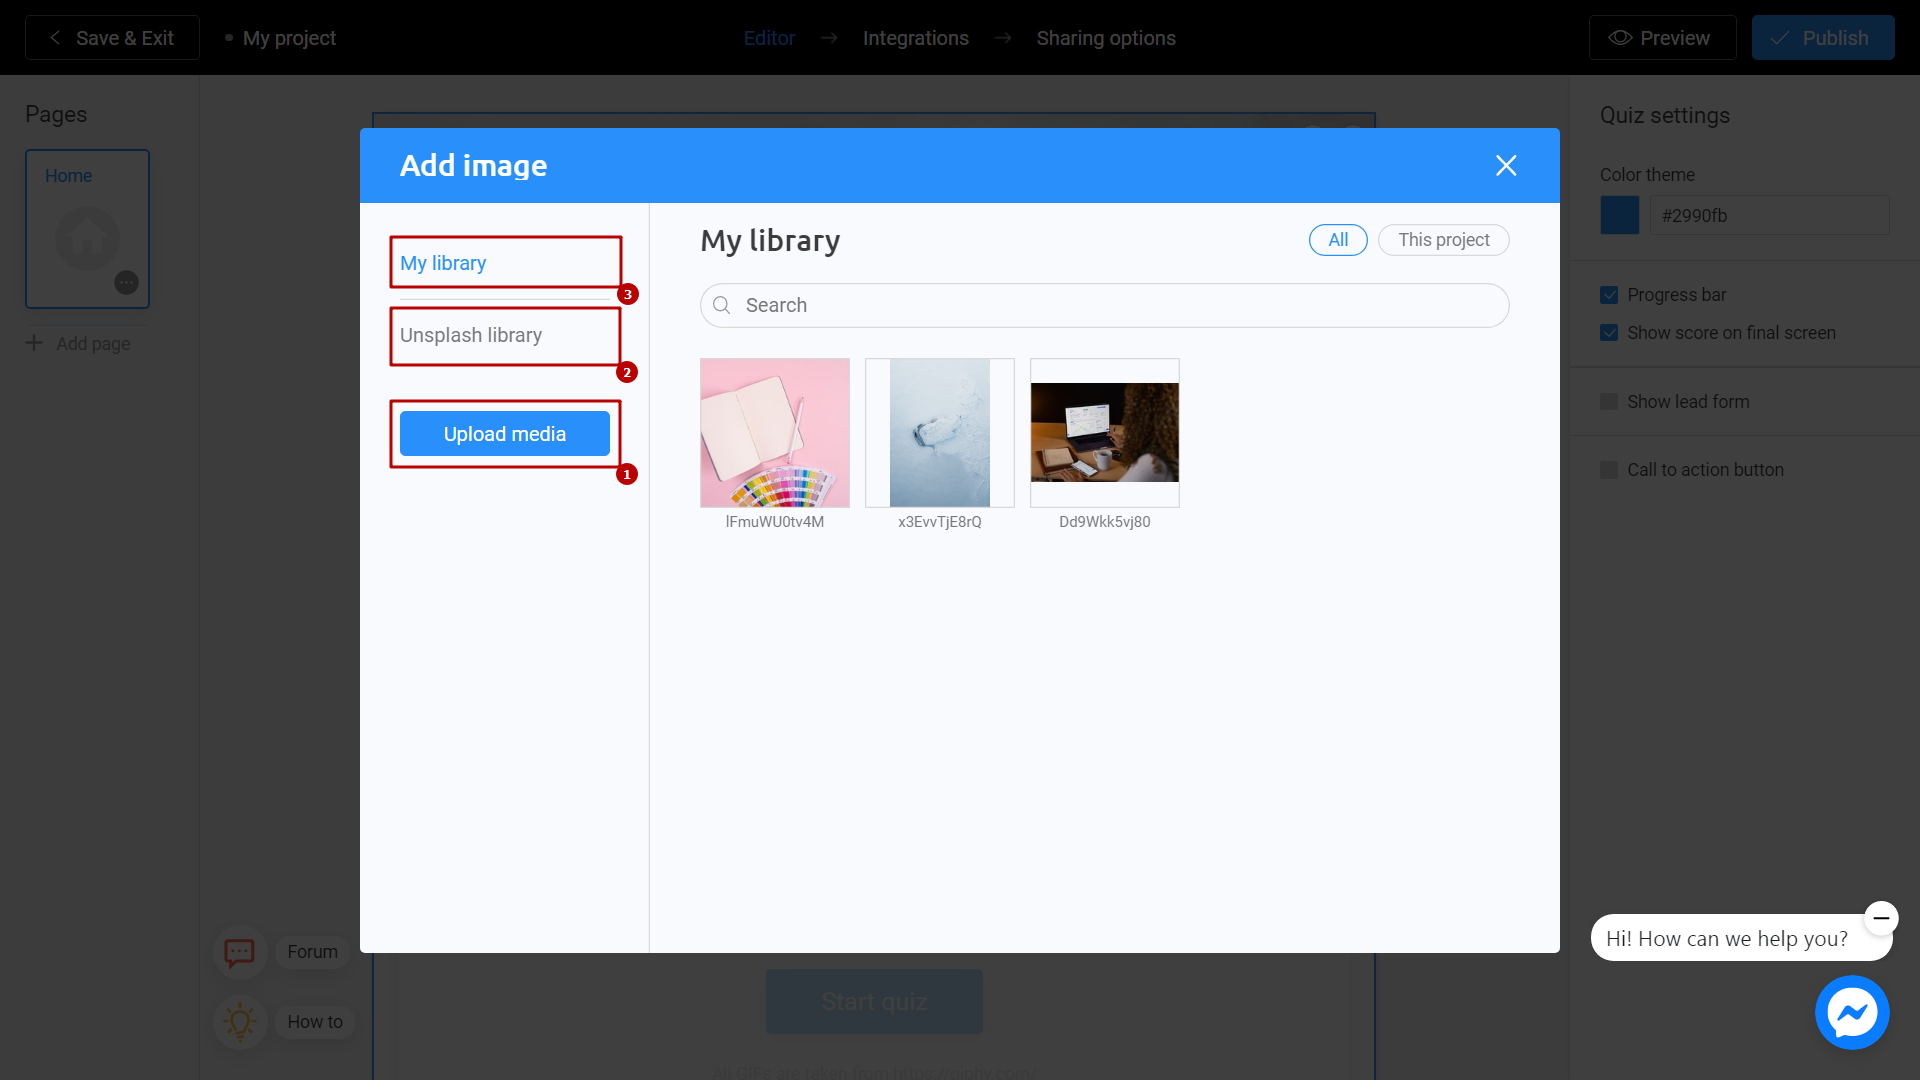
To upload a photo from computer, click the Upload media (1). You can also use the photo library by going to the Unsplash (2) library if you do not have a suitable photo on your computer. The My library (3) section will store images that you have previously used in your projects. After selecting an image, click the Place Image button. It's done!
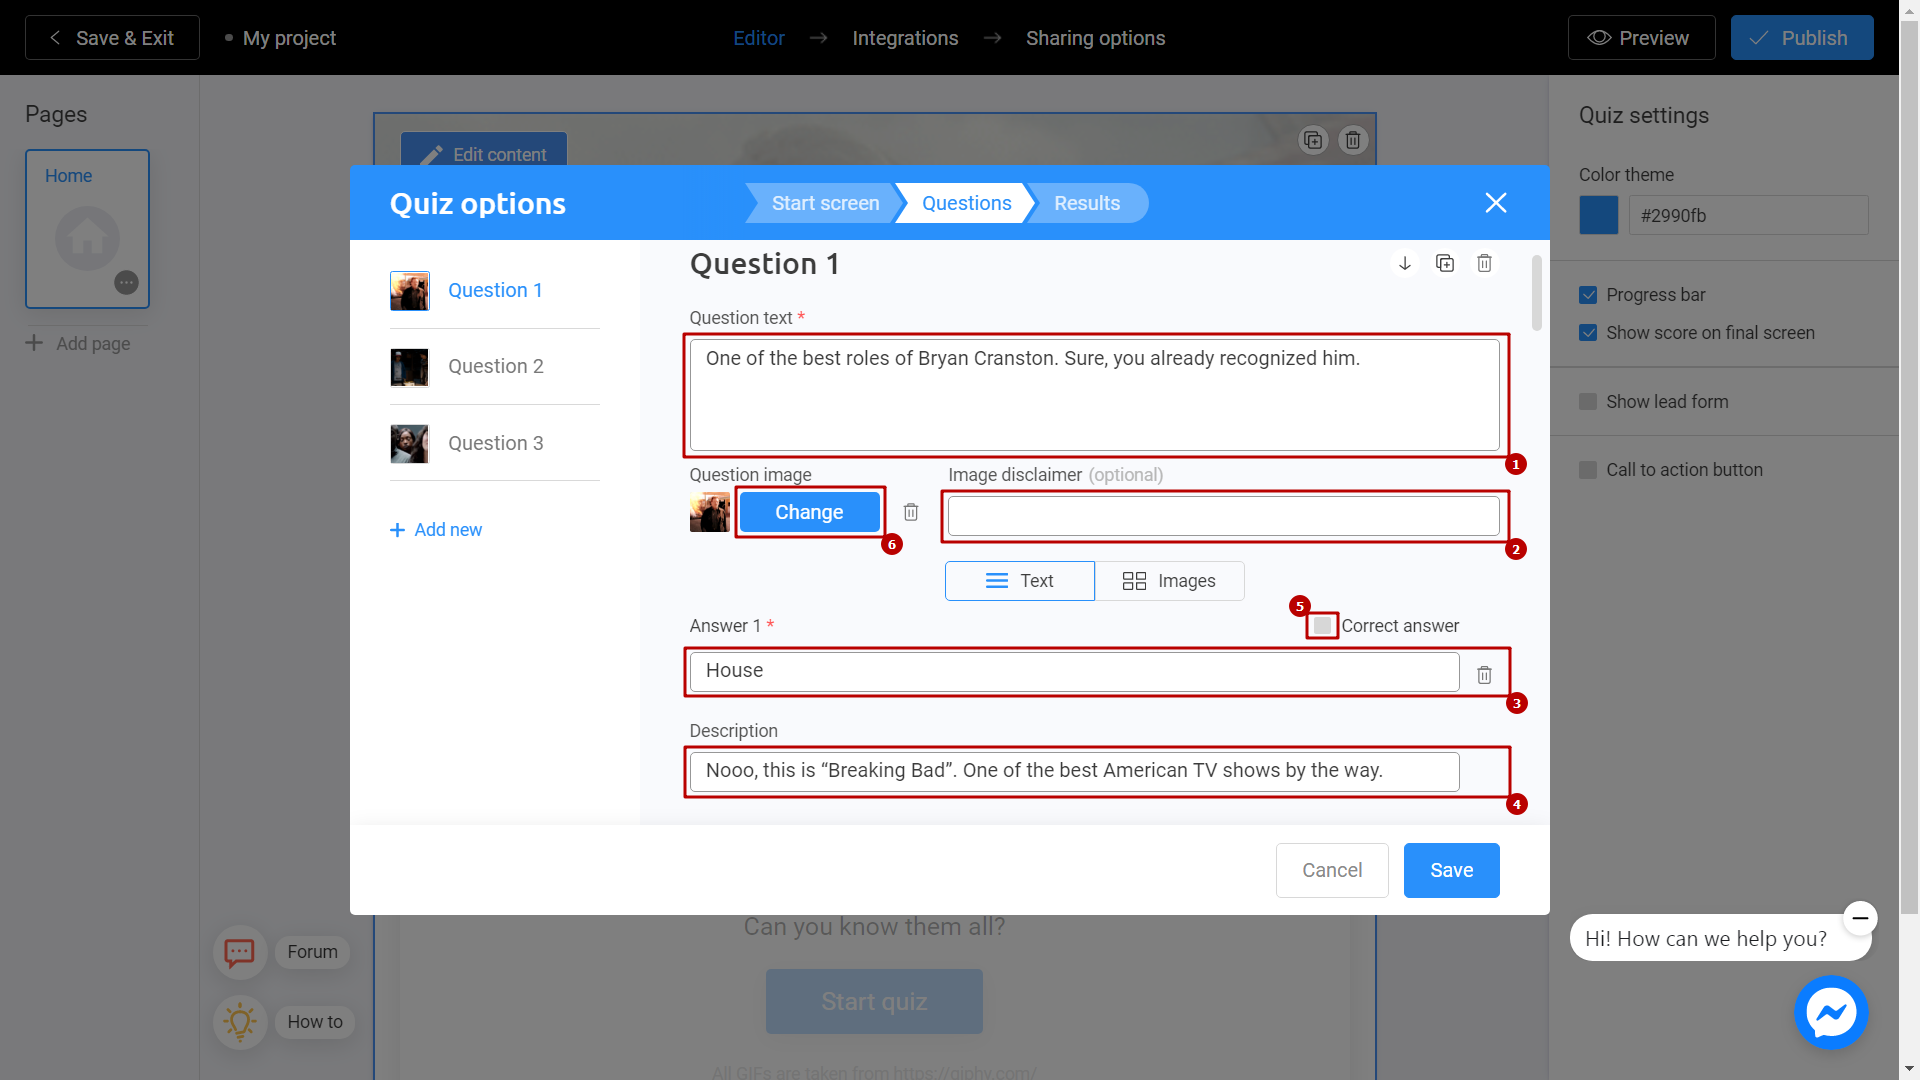
Then , go to the Questions section. Fill in the field Question text (1) and Image disclaimer (2) (if necessary). Go to the field Answer 1 (3). This will be our first answer. In the Description (4) field you can write the text that will appear on the screen if the first answer is selected. Also, you can mark an answer as correct by checking the box Correct answer (5) . You can also add an image to your question by clicking Change (6).
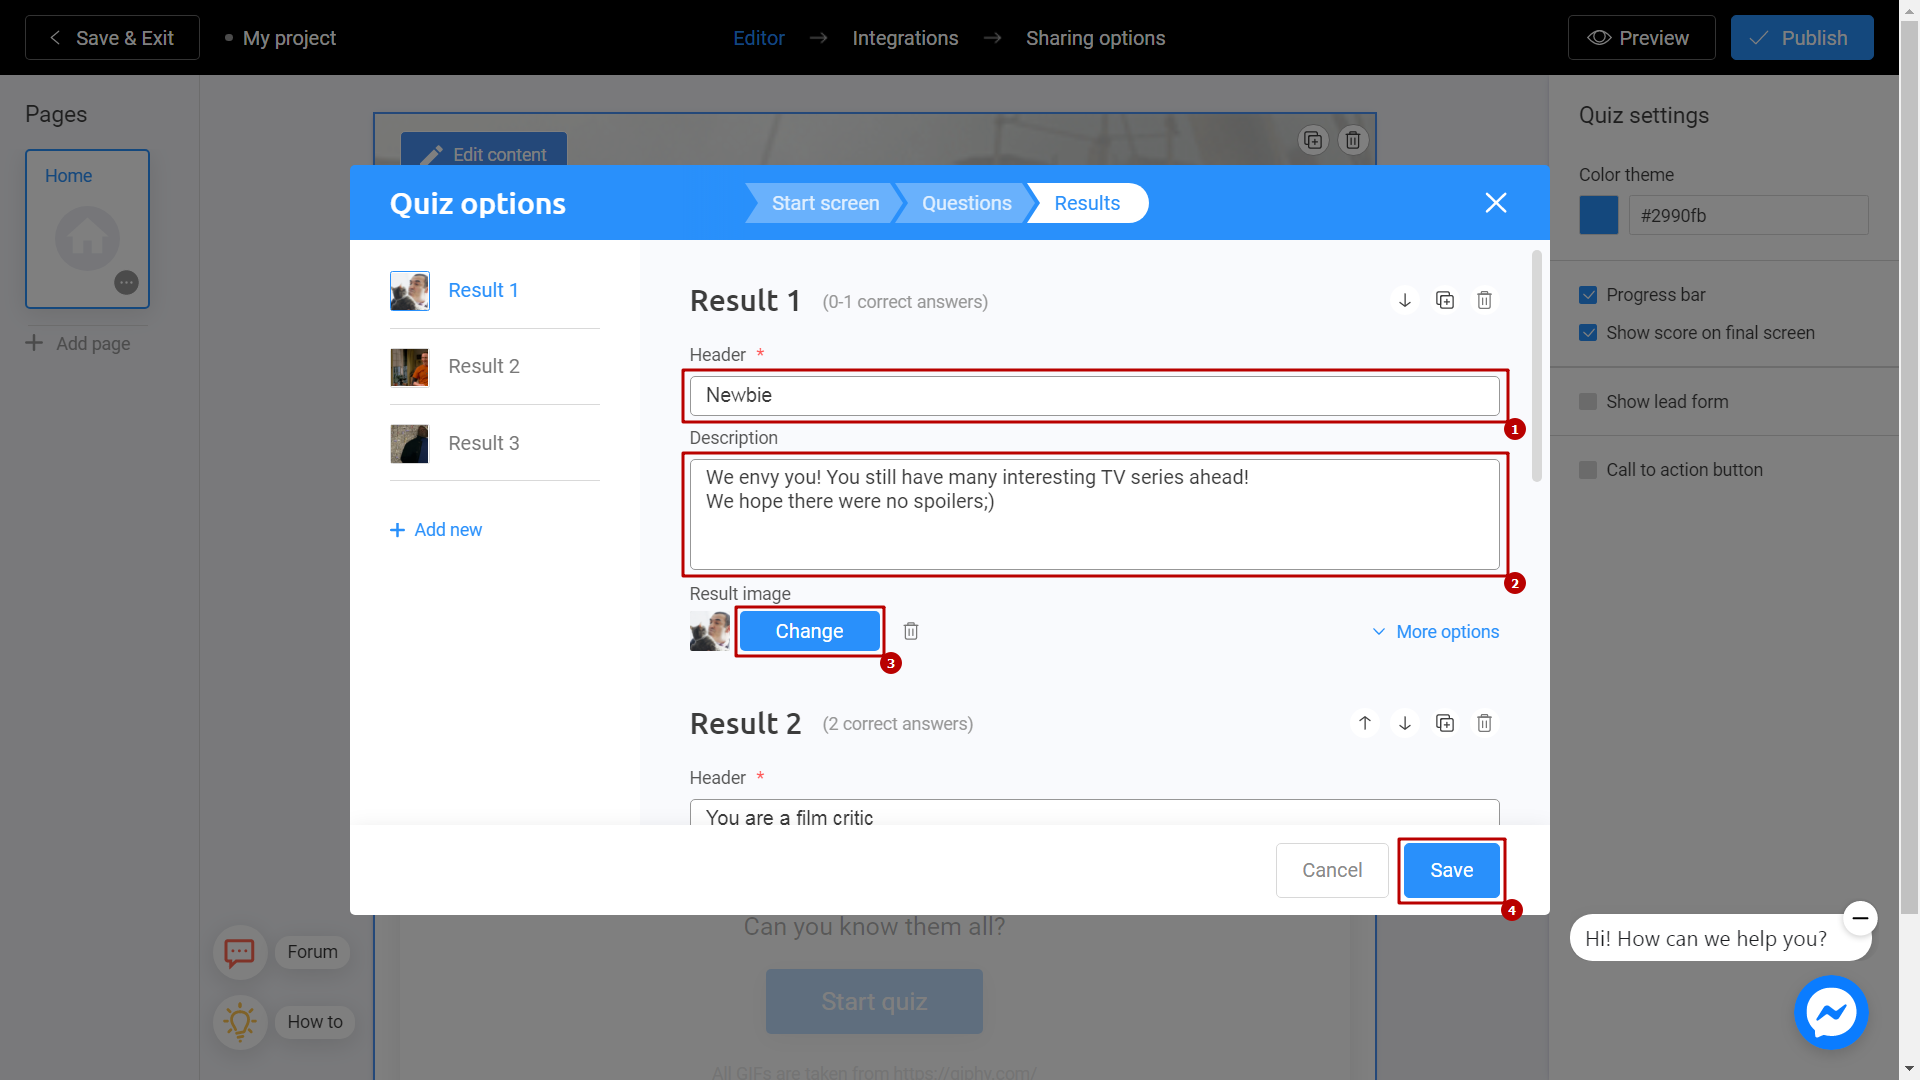
Finally, go to the Results section. Fill the Header (1) field and give a short Description (2) to the heading. It could be a reward for effort or a comforting speech. We can also attach an image to this result by clicking the Change (3) button. We do the same with the rest of the test results. After finishing editing, press the Save (4) button.
Additional Settings
There are several additional settings you can apply to your project. You can find them on the right side of your screen, and each one can be activated by simply checking the corresponding box.
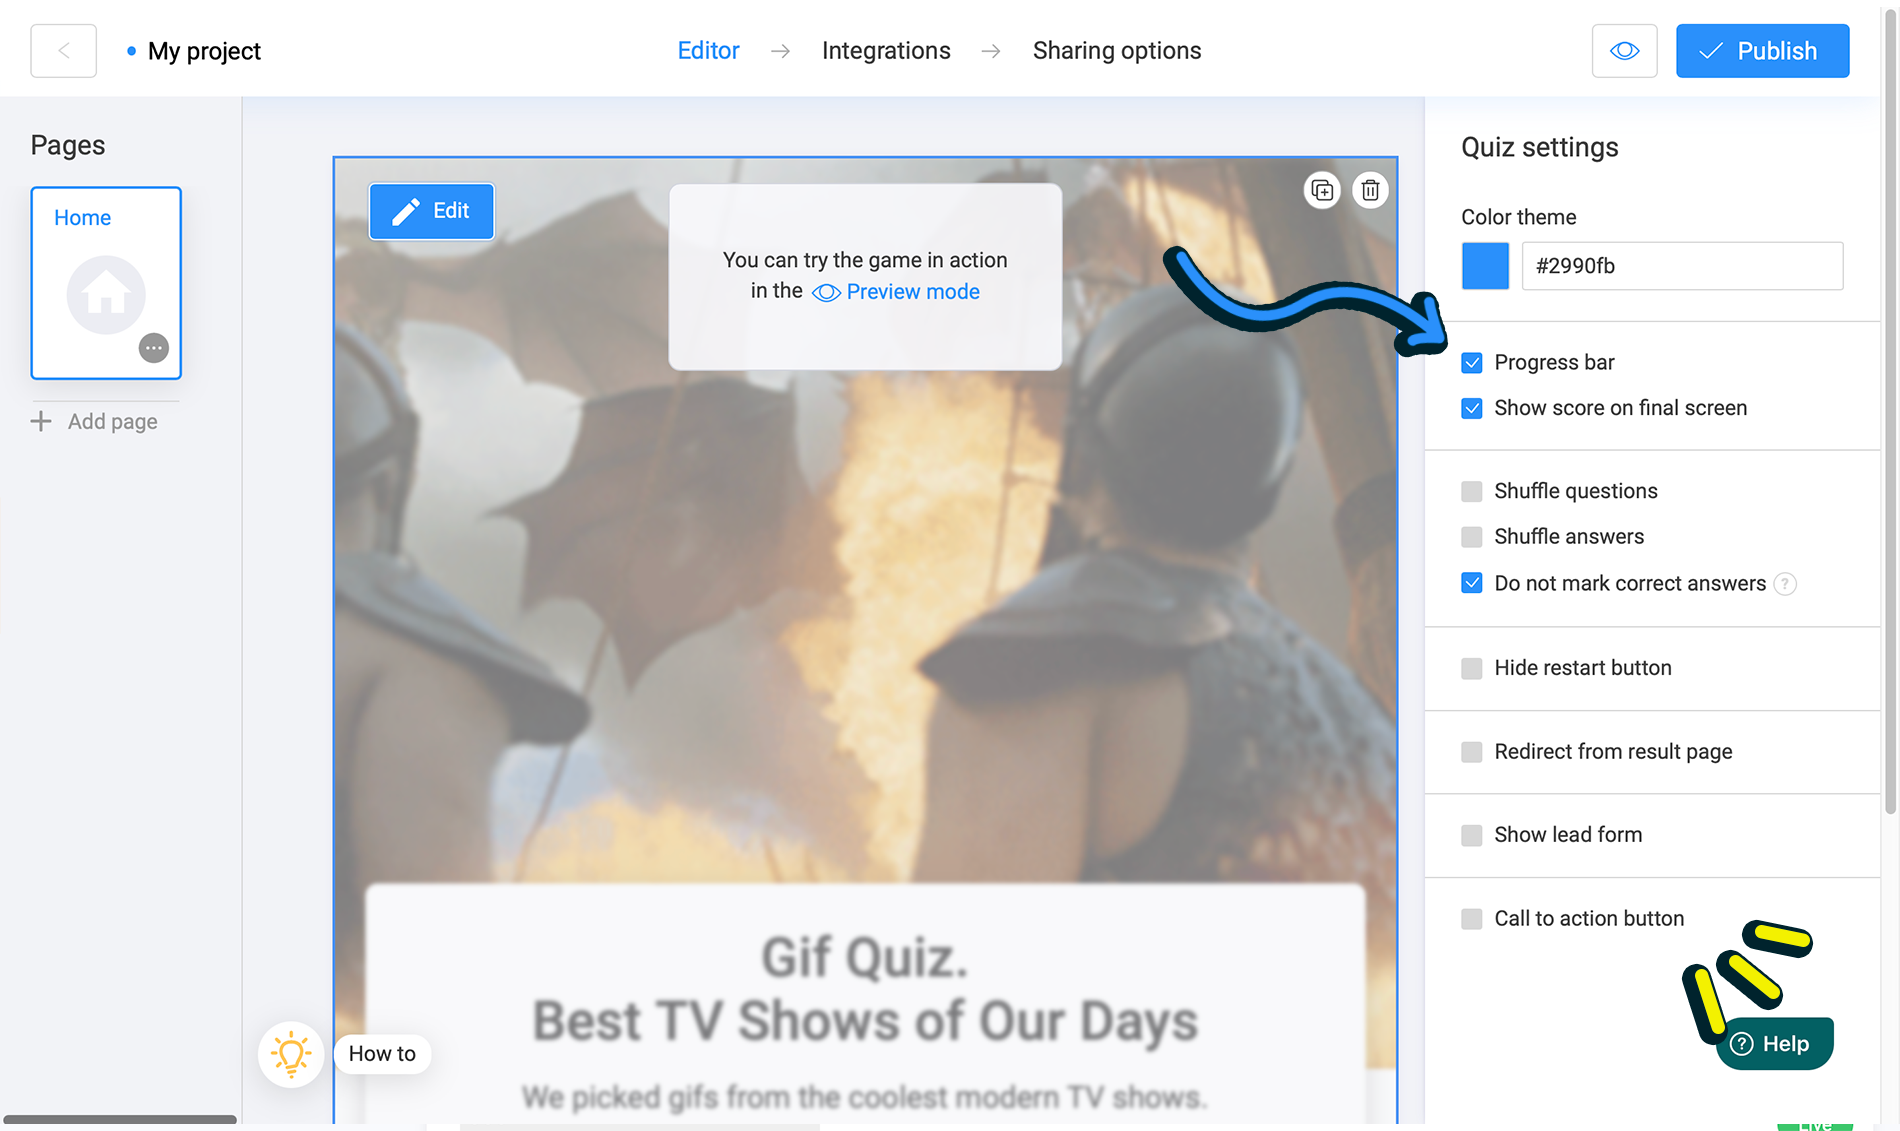
Progress bar – Allows users to track their progress by showing which question they are currently on and how many questions remain. If disabled, users won’t know how many questions are left.
Show score on final screen – Shows users how many correct answers they got in the quiz. If this option is turned off, they will only see the final result screen without details on their score.
Shuffle questions – Randomizes the order of questions in the quiz.
Shuffle answers – Randomizes the order of answer options for each question.
Do not mark correct answers – When enabled, users won’t know if their answers are correct as they go through the quiz. When disabled, they’ll receive immediate feedback after each question, including the correct answer.
Hide restart button – Removes the “Restart” button from the final results screen.
Redirect from result page – Automatically redirects users to a specific website after they finish the quiz, based on a time delay that you set.
Show lead form – Adds a customizable lead form at the end of the quiz. Users must complete this form to see their results.
Call to action button – Adds a button at the end of the quiz that directs users to a website of your choice.
Save and share
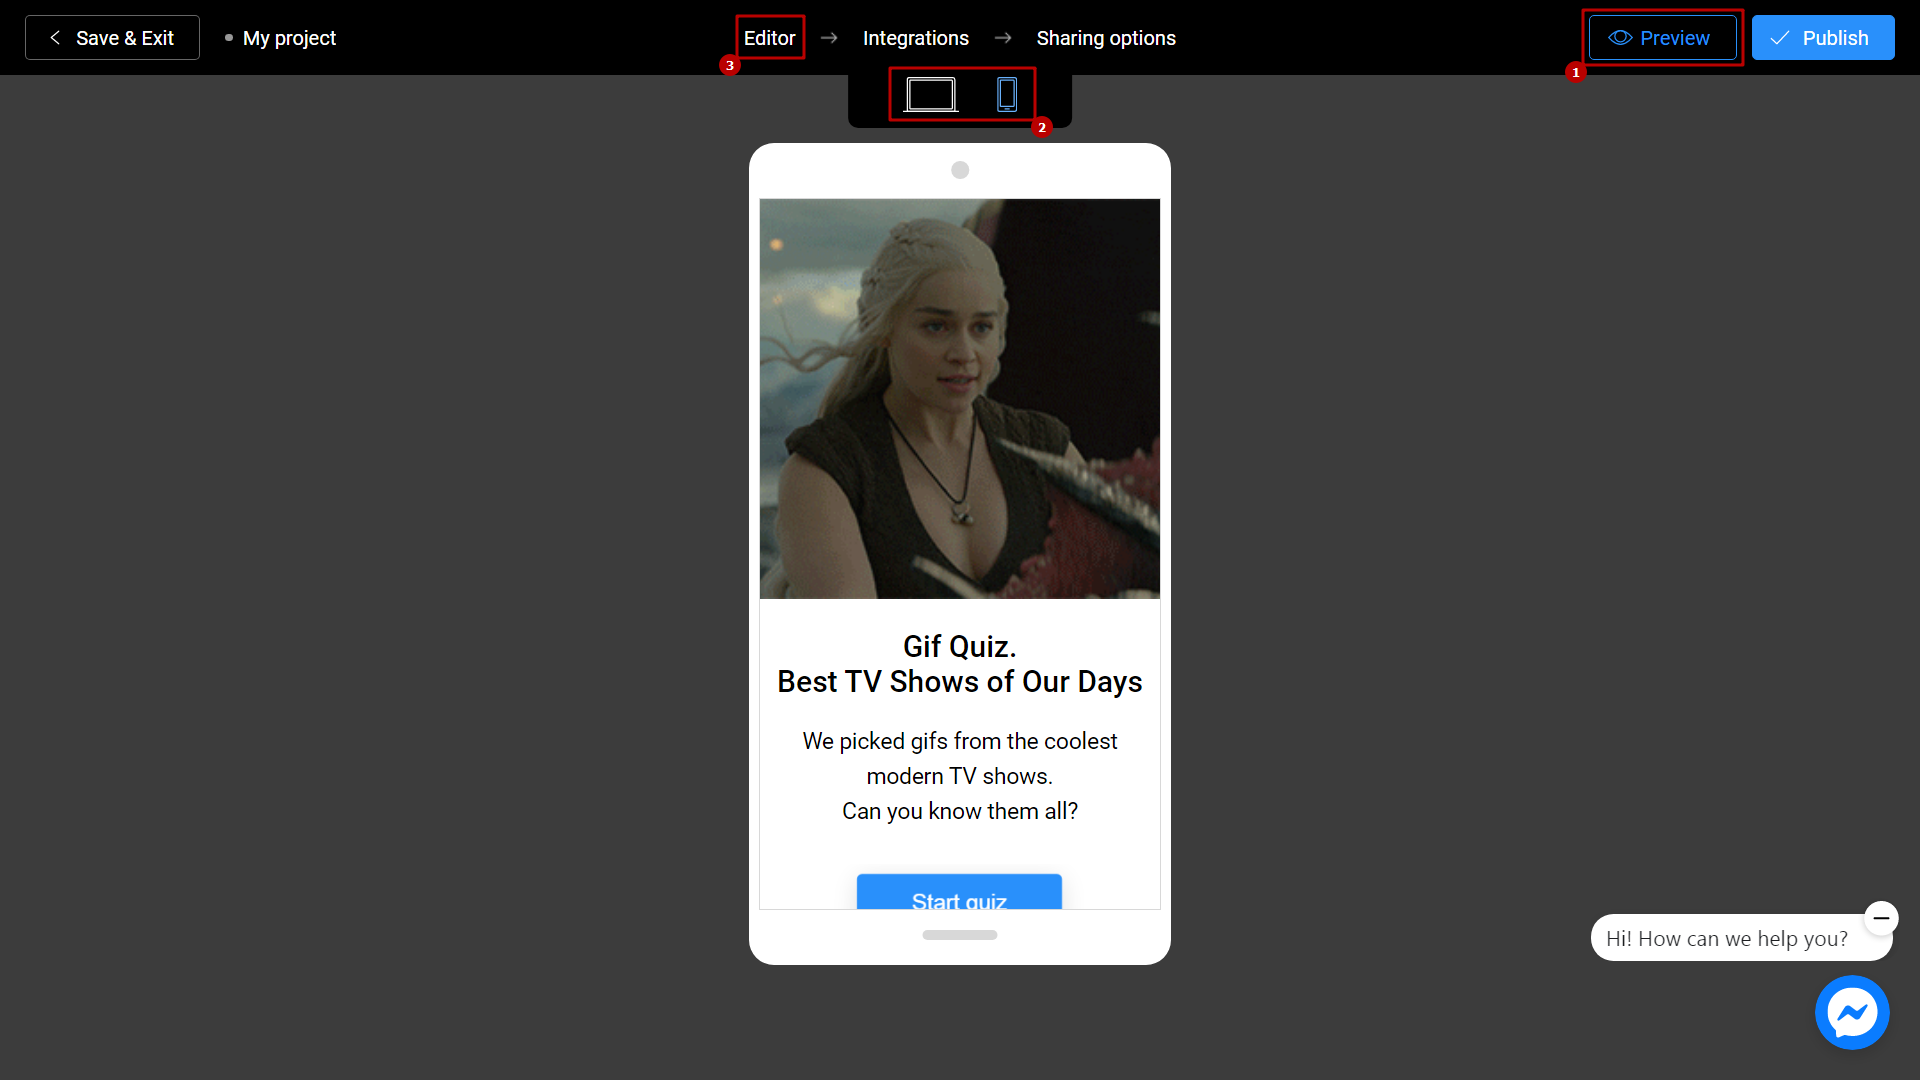
Click the Preview (1) and evaluate the current state of your project. Try your test and don't forget to rate how it looks on different devices. To do this, switch between the phone and personal computer (2) icons. If you notice an error or decide to fix anything, return to the Editor (3) by selecting the appropriate menu item.
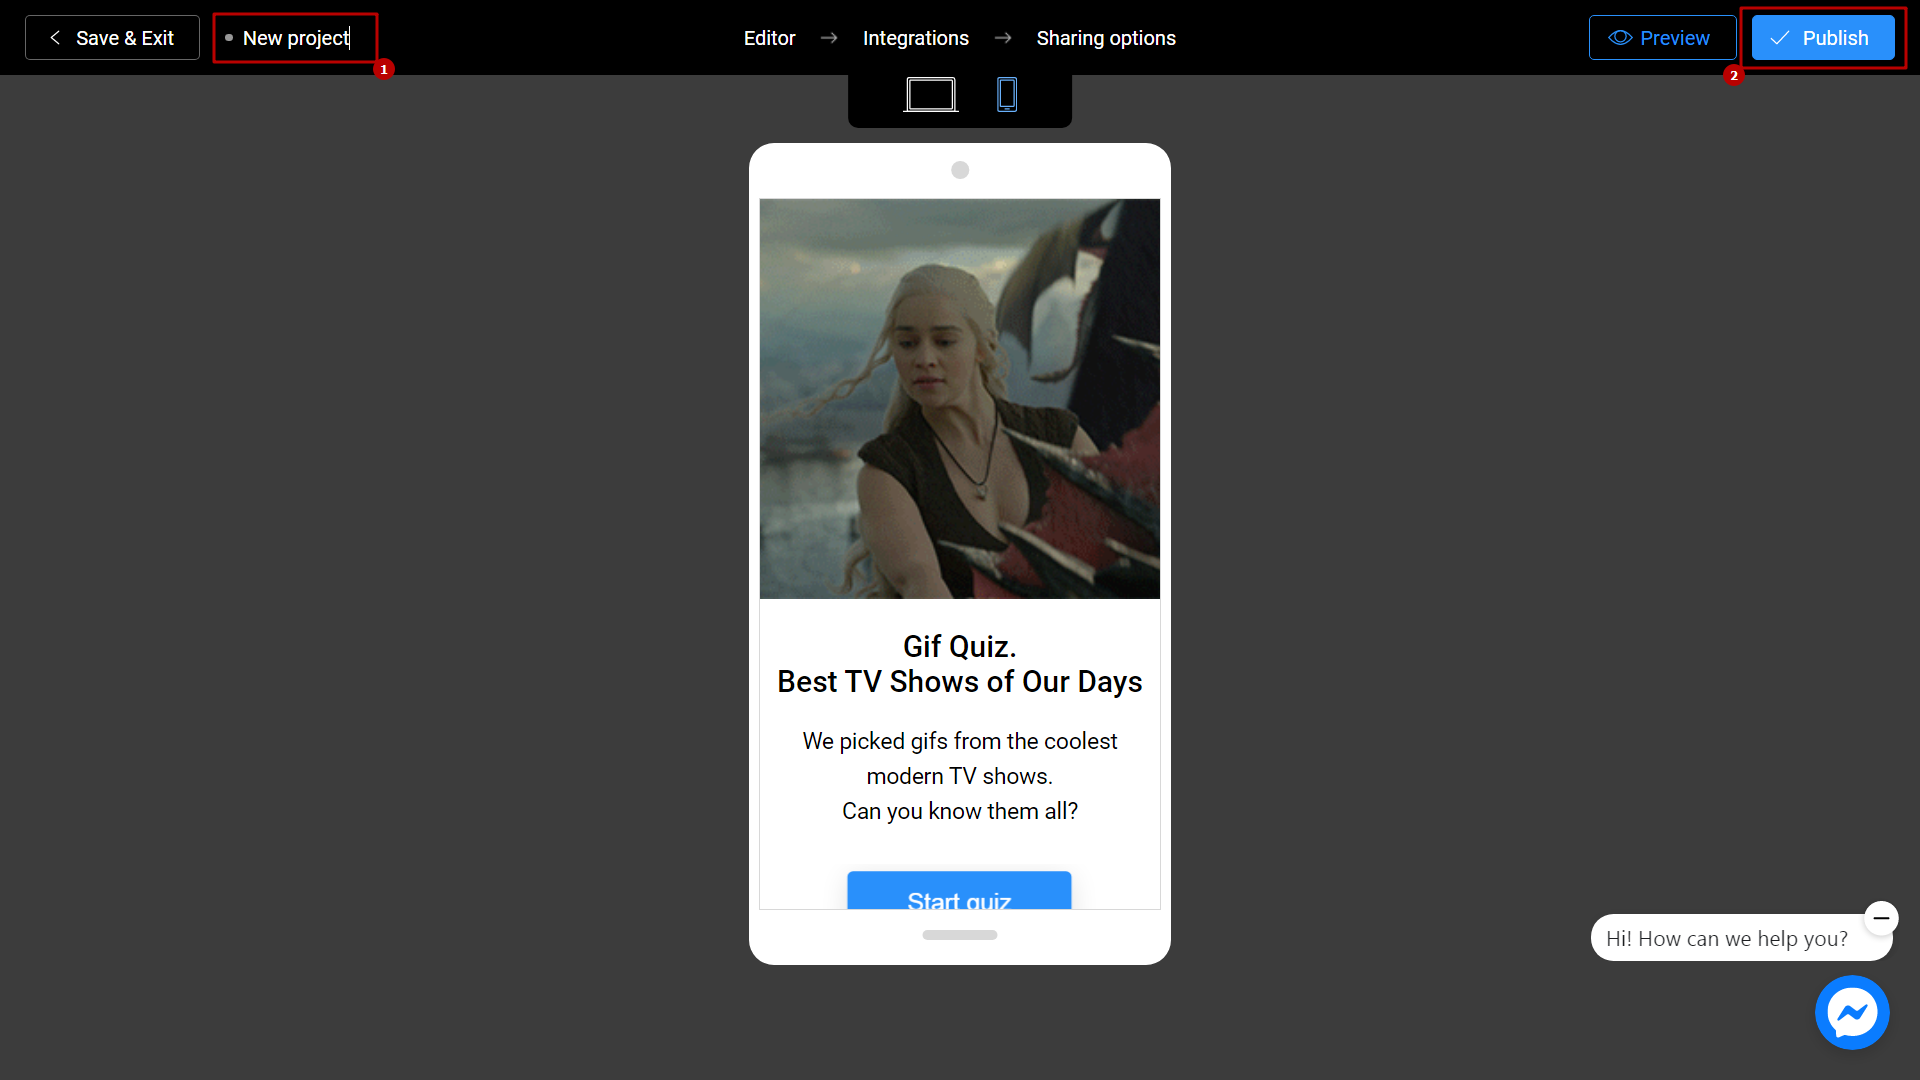
Don't forget to select a Title (1) for your project. This will make it easier to find him. After that, you can safely click the Publish (2) button. .
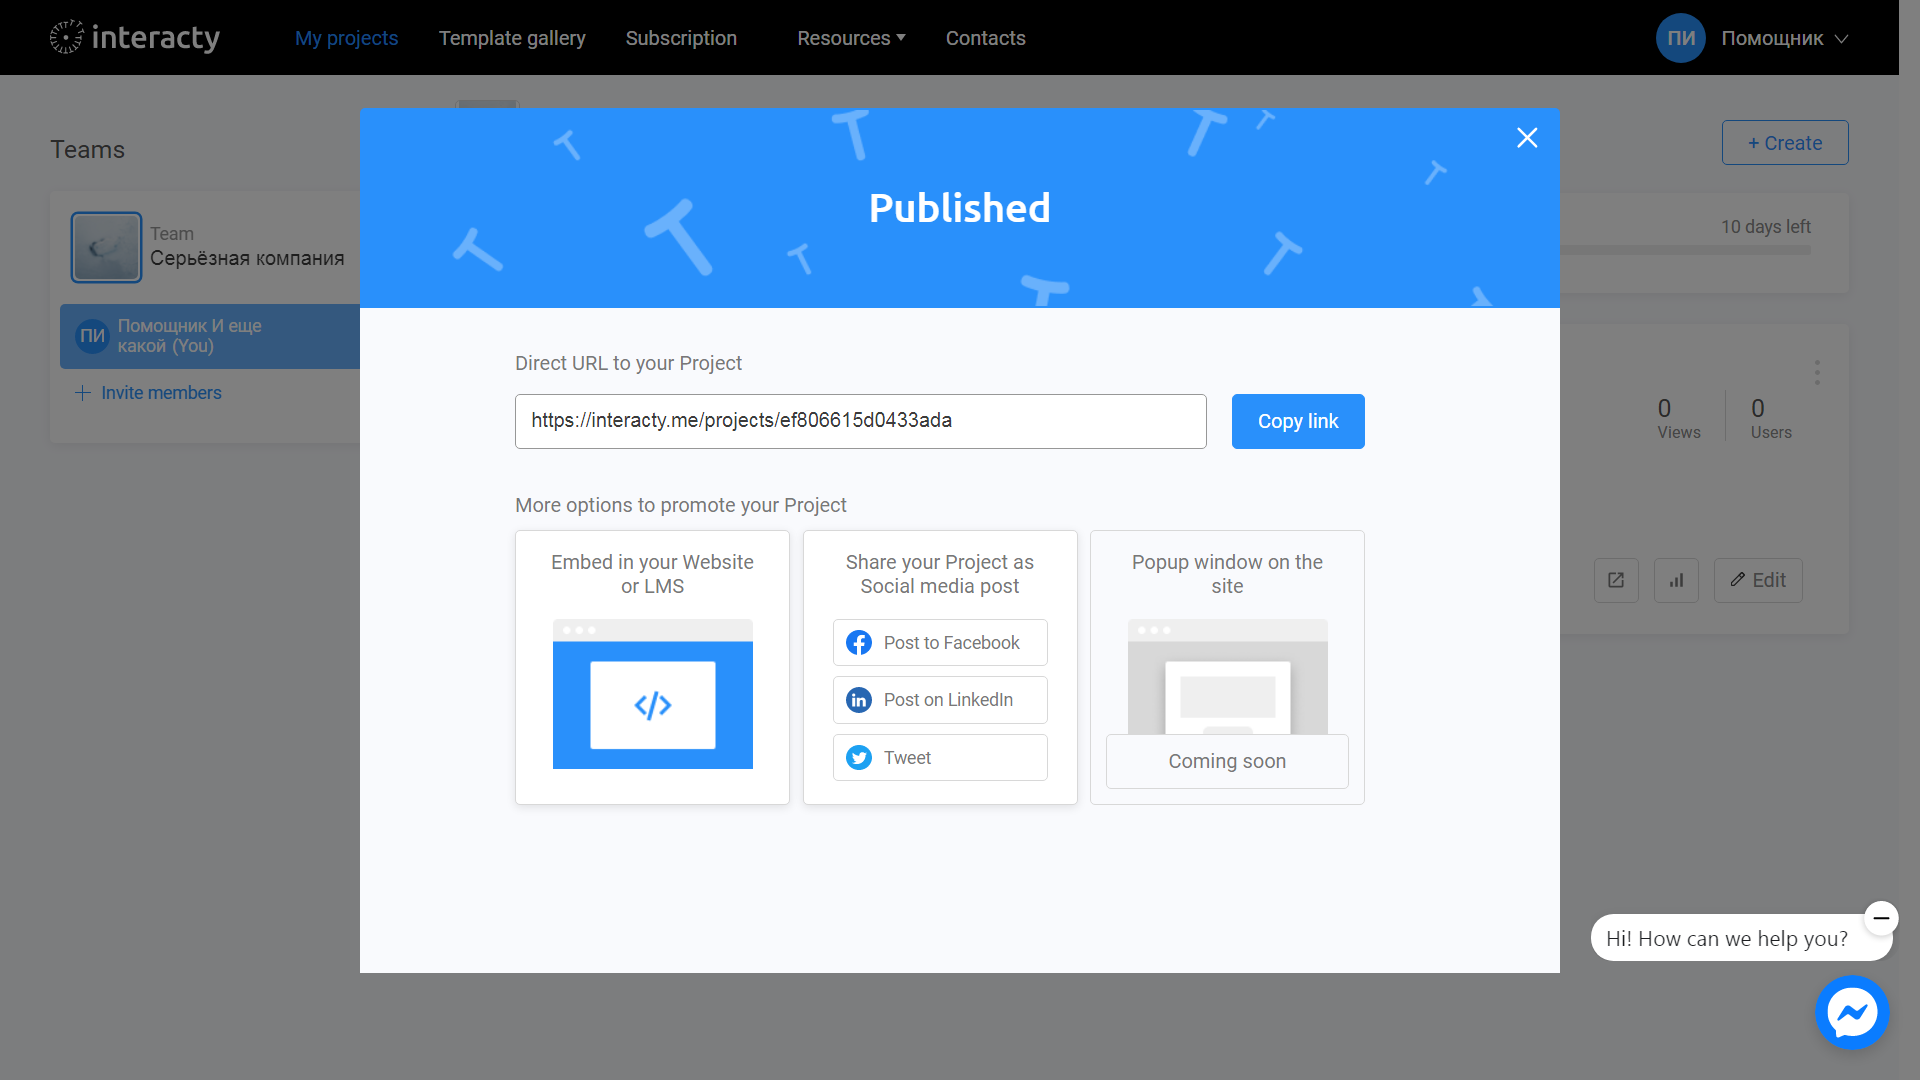
Your project is ready! You can share with your friends by sending a link, or choosing any other convenient way.
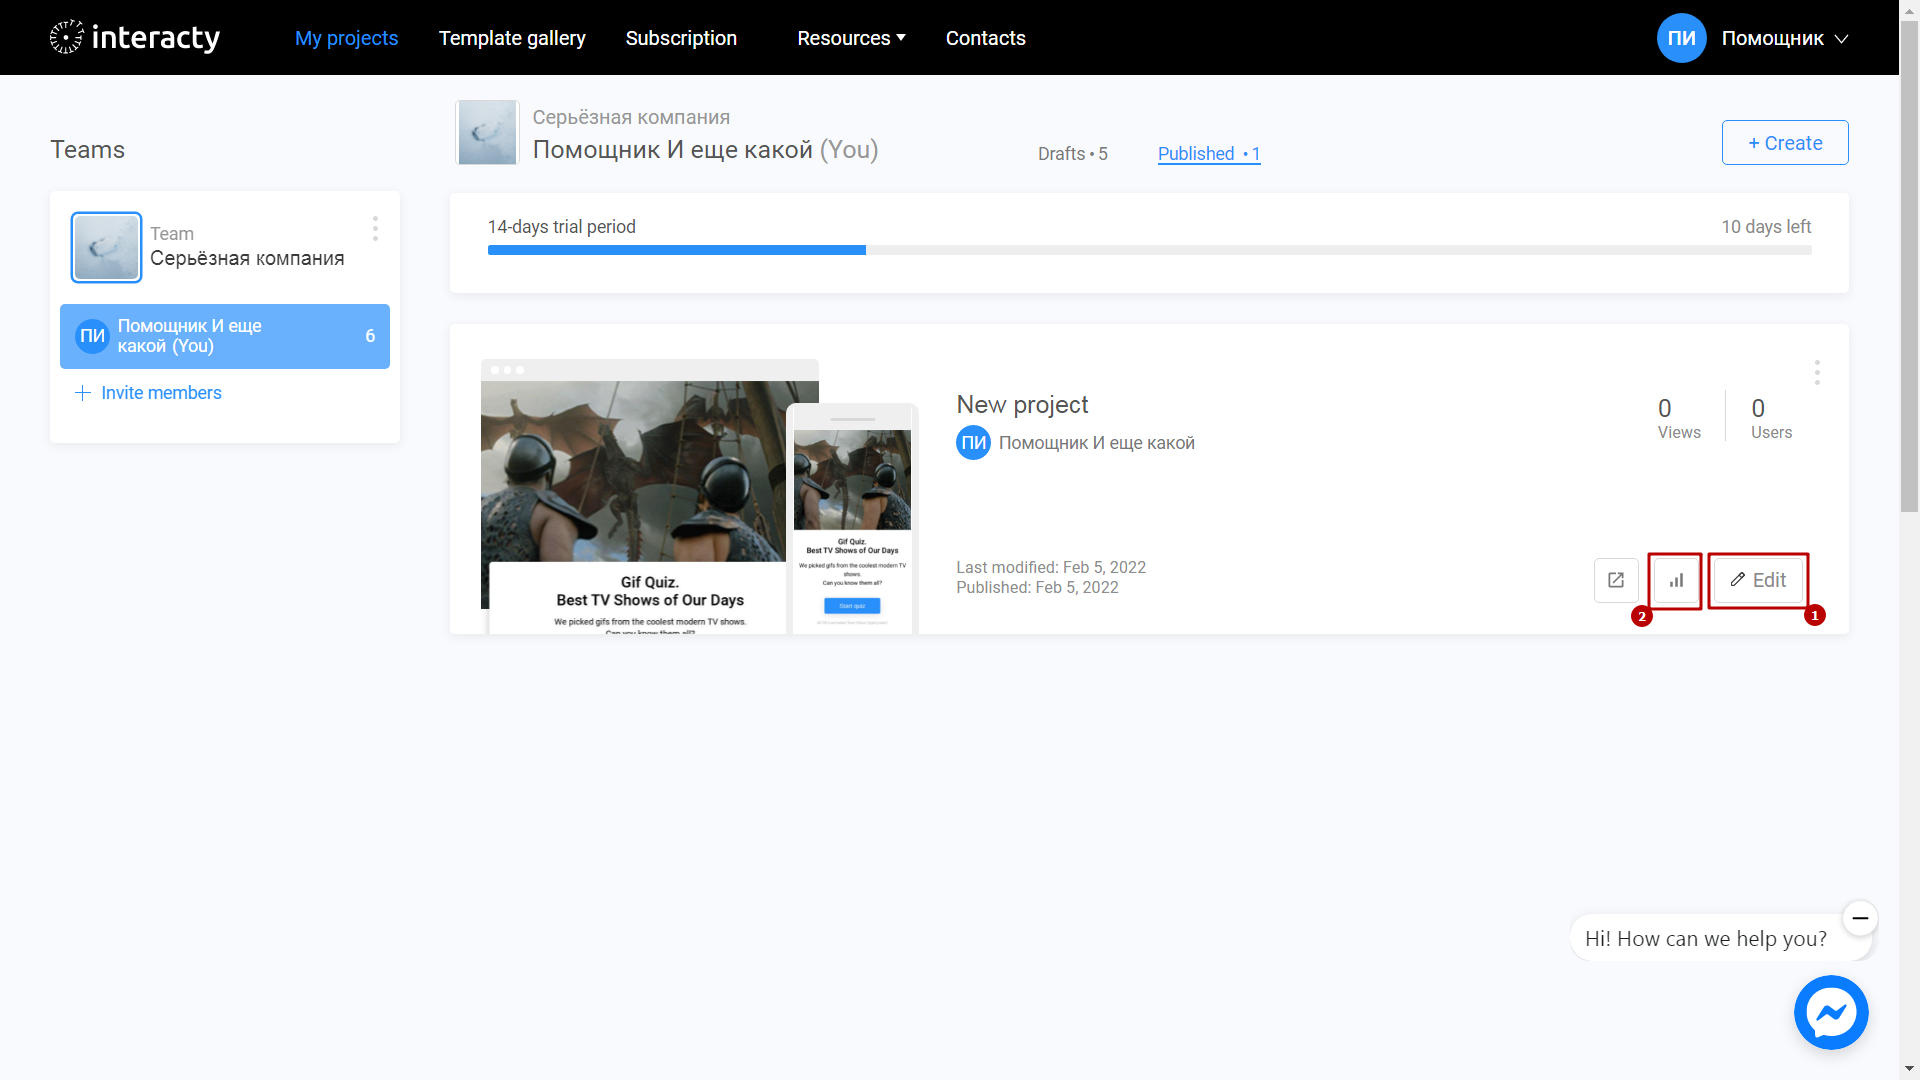
You can always return to editing your template again by clicking the Edit (1) button in the list of profile projects. You can also check Statistics/leads (2) by clicking the corresponding button.
Learn how to create engaging trivia quizzes in minutes with ChatGPT and Interacty! Watch our YouTube video to see how it’s done.